March 31, 2016

An other Hazes portrait

Using the ideal combination (at least until I find something better): Shooting Inspire H2O waterborne paint, mixed with Createx 4012 reducer through an Iwata Custom SB onto Createx Yupo paper (45 x 32 cm). Until recently I favored the Iwata HP-BH airbrush, but the Createx 4012 reducer allows the H2O paint to snugly pass the Iwata Custom SB nozzle / needle combo, while NOT continuing to flow after hitting the paper. Yupo is a synthetic paper which has an extra smooth surface on which paint 'spiders' easily since there is a minimum of grip. But Createx seems to have solved the paradox of paint having difficulty to pass small size nozzle (0.18 mm) while making it stable immediately after hitting the paper.

The clusters of molecules of paint typically are ten times smaller than the nozzle opening, which may sound like a lot, but actually isn't since paint builds up on both the needle and inside of the nozzle, which rapidly narrows the surface through which paint has to pass. A good reducer somewhat reduces the size of the paint molecule clusters and keeps them afloat before the paint is exposed to air. After that it should allow the paint to adhere to the surface the paint is sprayed on. This is exactly what the Createx 4012 reducer does. This is of course asking a lot of the reducer medium. The price the artists pays, is being very alert on the sounds the airbrush makes; if it starts to whistle, immediately move it away from the paper, clean the needle tip or even take the needle out and clean the entire needle. Than blast a few pulses of air through it to remove clogs of paint.

Which all is very convenient, since this portrait is a rush job...


In 2.5 days from blank paper
to a virtually framed portrait


Apr 03 2016 - 20:00


Apr 01 2016 - 02:00


Apr 01 2016 - 01:00


Apr 1 2016 - 00:00


Mar 31 2016 - 22:00


Mar 31 2016 - 17:30


Mar 31 2016 - 11:30


February 29, 2016

Danny Trejo - freehand airbrush portrait

Freehand airbrush portrait of Danny Trejo, work in progress. Started using Vallejo Flow Improver with Inspire H2O. Mix ratio paint : reducer : flow improver = 4 : 12 : 2. The increased viscosity results in less tip dry and slightly longer drying time of the paint, which improve color blend fades. DO NOT use Flow Improver when spraying ultra-fine crisp lines, because the mentioned properties also cause the paint becomes too fluent  after it hits the paper and spreads in all directions, which airbrush artists call spidering. The dimensions of the head are approximately 28 x 28 cm. I used an Iwata HP-BH airbrush and Van Beek Graphic Art Supplies Retouche paper.

Oldest stage below, newest on top. By the way, if you click on one of the images, you will see them against a dark background (in Google's 'lightbox') and will be able to scroll through all photographs on a page by turning your mouse's scroll wheel on a PC or Mac. As usual, below the photos additional information concerning this portrait is presented.


In frame


Reworked in July 2022 in Affinity Photo


Mar 27 2016 - 14:00


Mar 3 2016 - 12:00


Feb 29 2016 - 13:30


Feb 29 2016 - 12:00


Feb 28 2016 - 21:00


Mix-ratio
It occurred to me that a mix-ratio paint : reducer over 1 : 3 doesn't work well with Inspire H2O. For ultra-fine lines 2 drops of reducer for each drop of paint works best. When the paint is diluted beyond the 1 : 3 ratio the paint skids all over the paper surface - the same thing occurs when spraying on canvas. I sprayed this one on wood and acid free smooth paper. It's probably worse on synthetic paper (which I haven't yet tested). But when you stick to the 1 : 2 ratio it is safe; the paint behaves fantastic.

Air pressure
I never look at the dial of the pressure gauge. I just blow air against my hand to find the proper pressure to spray with. I tend to lower the air pressure so that the paint is barely pushed out of the airbrush, but one has to be careful; at some point the airbrush starts to make stipple patterns (which is controllable with intense concentration) and with even lower pressures becomes unpredictable. Also at low pressures, the jet of paint takes a few seconds to stabilize. I keep a small piece of paper in my left hand (I hold the airbrush in my right hand) and after stabilizing 'jump' to the painting surface. I re-stabilize the jet of paint on the small piece of paper very regularly and make sure that the needle is cleaned as often as necessary by taking it out of the airbrush and wiping it clean. Inspire H2O Black Smoke paint stays stable longer than its Base Brown and causes less tip dry, I found out suring spraying.

Removing blots
When a spider forms, it can be removed by quickly dipping the spot with the hand that is not holding the airbrush. This trick leaves no unwanted residue as long as the hand motion is approximately perpendicular to the painting surface. Smearing motion will leave traces.... Mind you, this only works when spraying with very low air pressures that do not deposit a lot of paint on the surface per measure of time.

Working in layers
The master painters of old (dudes like Rembrandt and Vermeer) often used a technique called 'glacis', which means working in transparent layers on top of each other. They knew that working this way created the illusion of depth and allowed subtle color nuances to be achieved that can never be reached in one pass. These tricks that the old masters used, work with the airbrush as well. In fact, the Inspire H2O paints are excellently suited for them. They're transparent, but also have the proper pigment intensity to create great results when working in many layers. It is the exact opposite as T-shirt (speed) painting in which colors are blasted on the tissue in one or two passes at higher air pressures, because the T-shirt fabric absorbs the paint well and spiders will therefore be prevented. But if you like working in more subtle ways on harder and smoother surfaces like paper, airbrush board and canvas, spray in many layers (using a number of different colors).


This is what the cut-out will look like when framed.


February 12, 2016

Creepie prez - Yupo paper test

My first impression of the man was that he was creepy. There is a dispute whether he was a satanist, but there was never any doubt that he lead a tough and crappy life, particularly in his younger days. I thought his facial features would lend themselves well for a test of Createx' Yupo airbrush paper. It is a synthetic material, which I had never tried before. I used an A4 size sheet, which basically forced me to spray more delicate lines and areas (large paintings are no challenge). The paint used for the test was Inspire H2O and the airbrush an Iwata HP-BH.

Yupo paper requires very careful appliance of paint - low pressure (barely enough to push out the paint; I never look at the compressor's air pressure gauge) and a mix-ratio of paint : reducer = 1 : 7. The airbrush rarely is further away from the paper than a few millimeters while spraying during the entire test.

Erasing must be done with great caution, especially when using hard material erasers. Erasers made of soft material are more forgiving, allowing to erase controlled fades. Erasers of hard material at some point abruptly remove the paint entirely, leaving a blank spot in an airbrushed area. When used with cautious dexterity they can also be used to erase faded areas, but it remains a tricky enterprise.

As usual, oldest stage at the bottom, newest on top. Findings concerning spraying and erasing on Yupo synthetic paper you see at the end of this page below the images.


Feb 14 2016 12:30 - although one can
never be sure, I think it's finished now...


Feb 13 2016 19:30 - Couldn't leave it 'unfinished'
Did some more work on the portrait...


Feb 12 2016 20:15


Feb 12 2016 15:00


Feb 12 2016 13:00


Feb 12 2016 12:00


Feb 12 2016 - First experiences with Yupo paper
Not sure what to think about synthetic Yupo paper. Perhaps it has to grow on me. I don't think it is an improvement over 'traditional' surfaces; it's very slippery and requires caution in erasing. On the other hand colors sprayed seem more radiant and saturated (provide applied in many layers).

Feb 13 2016 addition - Erasing Yupo paper better understood
Erasing Yupo 2.0 Started to get the hang of it I guess. Yupo allows to bring the white back entirely when erasing correctly. Clay board and various types of paper allow artists to erase back to approximately 90% white, but Yupo goes all the way. Experiment with eraser of different types of hardness / softness. Once the effect of working with various erasers is understood, this type of surface can be very helpful in creating perfect highlights and removing unwanted areas of overspray. I can now imagine that some artists would really like this synthetic surface.

Erasing very thinly sprayed areas is the most tricky; a little too much pressure will remove all paint from the surface. The good news is that the white area, left by accidentally removed paint, is perfectly sprayable and corrections are easy to make. This property also lends itself quite well to soften hard edges caused by masking. I am starting to like Yupo more and more...

Yupo and Inspire H2O
From what I've read (haven't tested it yet) Yupo is not suited for all airbrush paints. But I find that the paper works quite well with Inspire H2O. I discovered that diluting the paint a bit less than I usually do - paint : reducer = 1 : 2 or 1: 3 - will slightly improve adherence to the surface, while not noticeably affecting its handling in the airbrush and worsening the clogging of paint. Artists accustomed to clayboard type of surfaces will need to adjust their spraying and erasing routines somewhat, but once they've done that I think they will appreciate it.

Feb 14 2016 - Yupo's non-absorbtion
I think I figured out why colors look saturated on Yupo and why corrections - spraying over accidentally erased areas - are easy to make. Colors are saturated because none of the pigments are absorbed by the surface; they are all layered on top of the paper and therefore all contribute entirely to the visual effect. Over-saturated areas that sometimes occur when using traditional paper or clayboard are simply not possible. Concerning the erasing: when a mistake in erasing is made, spraying over the area is starting all over again from scratch, not building on the remains that could not be removed. Conclusion: although airbrushing on Yupo required certain adjustments, I came to like it. To artists with above average dexterity and patience I recommend Yupo.


February 3, 2016

Charles Bukowski - freehand airbrush portrait

I never read novels, except a few written by Bukowski. His life, for the greater part, has been a struggle - abusive father, severe acne, alcoholism, arrest by the FBI (on suspicion of draft evasion), death of a lover, shitty jobs, publishers that failed to recognize his talent as a writer and poet, divorce and leukemia (which killed him), basically all the type of crap that makes life thoroughly miserable. In some cases that results in interesting facial characteristics, a challenge to airbrush artists.

Newest phase on top, oldest at the bottom. Below the latter is some more text.


Update March 7 2021

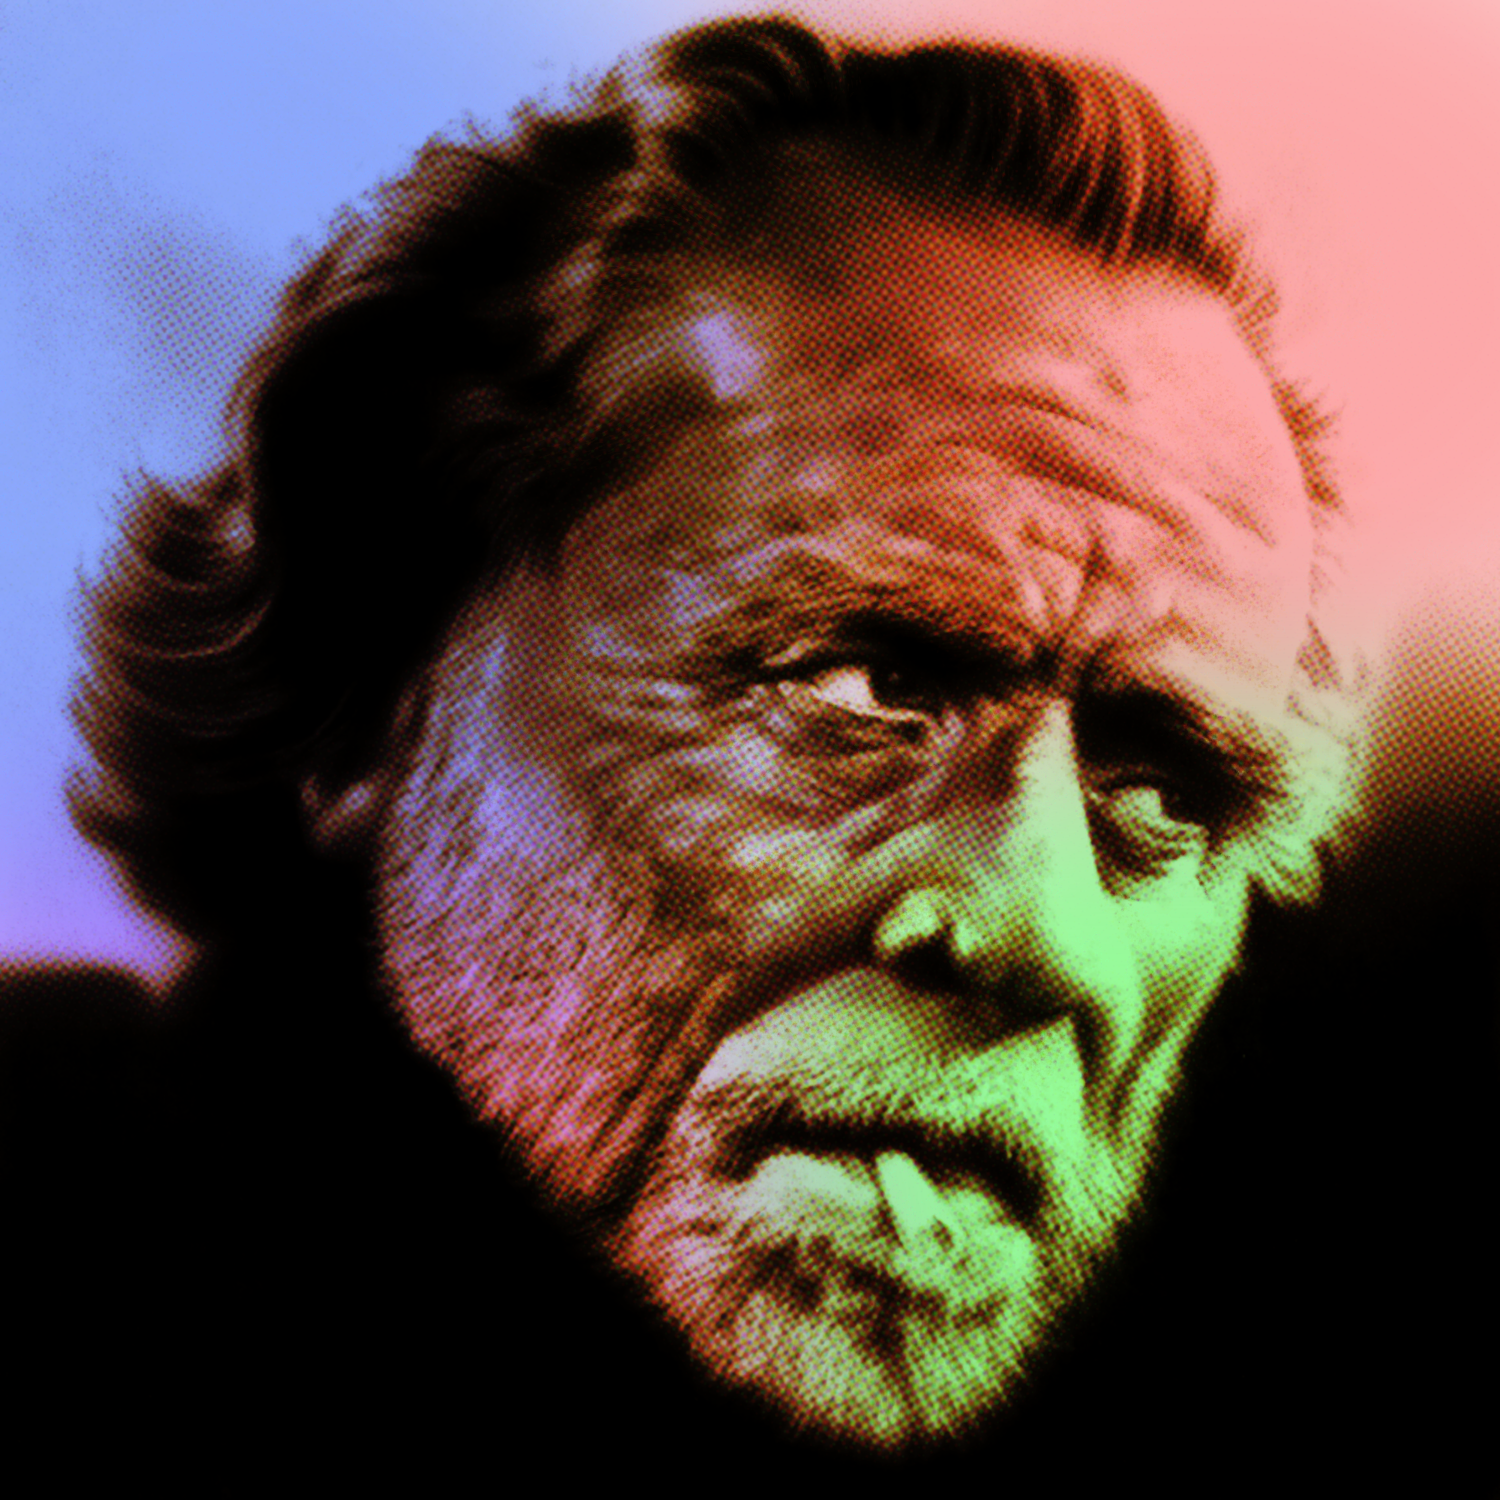
Four years after I sprayed this portrait with an airbrush, an Iwata HP-BH airbrush gun and Inspire H2O paint on paper, I digitally reworked it in Affinity Photo. Bukowski had a nicely twisted mind, resulting from the life he was cast into on this planet, that drove him to write hard hitting, strange books and thereby gaining a considerable following of people that probably had strange aspects to their personality as well. Which they carefully hid of course in an attempt to inconspicuously participate in the imposing human society in this dimension.

Affinity Photo has all the tools to allow to apply subtle details to any image that take it to a more elevated level. Artists that got familiar with this type of functionality appreciate the efforts of the developers, who most likely are artists themselves, given the perceptive properties of the program's features.


August 21 2021 - Colour overlay
added in Affinity Photo


August 21 2021 - Halftone filter
added in Affinity Photo


August 21 2021 - digitally edited
in Affinity Photo


March 7 2021 - digitally edited
in Affinity Photo


Feb 10 2016 12:00 finished


Feb 8 2016 12:00
Almost done. Charles Bukowski freehand airbrush
portrait. Only white highlights on skin and hair (this
will reveal how well Inspire H2O Base White works)


Feb 7 2016 20:30


Feb 6 2016 12:30


Feb 5 2016 23:00


Feb 5 2016 17:00


Feb 5 2016 15:00


Feb 4 2016 16:30


Feb 3 2016 21:00


Feb 3 2016 18:00


Feb 3 2016 14:00


Learned a lot while making this portrait. Diluted the paint as follows: Inspire H20 : reducer = 1 : 6. But in order to avoid having to spray with white too much (highlights and hairs) it will have to be diluted even more. This makes it necessary to spray more layers, which will take more time, but also give the painting more depth while allowing me more control over the intensity of areas and lines. I asked the mega talented Italian airbrush artist Luca Roccaforte once how he (and Alberto) sprayed the fine hairs in a fur and he told me they spray around it... It requires a lot of focus, control and time (patience), but it probably is the only way to avoid spraying the highlights and hairs with white over previously sprayed colors in order to prevent the infamous and irritating blue hue.

The paint I used (obviously) is Inspire H2O, the airbrush Iwata HP-BH and paper Van Beek Retouche paper - image size just under 30 x 30 cm. It would be a lot easier to spray a larger image, but there's no challenge in that. Also using solvent based paint would allow spraying of finer lines and less clogging, but it's not recommended for indoor use.

Photographs are shot with Samsung S4 Mini cellphone cam. It explains the low quality of the images. There is a noticeable difference between photos shot in daylight and in artificial light. All the different settings in Samsung's standard cam app and an app called 'A better camera' were unable to produce decent photos.

A note on the dreaded blue hue when spraying with white on top of previously applied colors
Spray around the hairs as Luca explained as much as possible. Accurate spraying of the shadows on and below hairs, minimizes the covering of white over other colors. Things go wrong when the white fades on its edges. When spraying crisp, hard edged white lines, the result is not too bad. Spraying with white as a final process does give the extra accent that makes paintings (especially portraits) stand out. Inspire's H2O is the best I've encountered so far. Mix ratio paint : reducer = 1 : 3 Clean the brush often; the white has powerful adhesive qualities and opacity while allowing to spray ultra fine lines (provided it is cleaned properly and often). To clean the airbrush I used an environmentally friendly organic type cleaner - ASA airbrush cleaner (500cc) from Airbrush Services Almere.

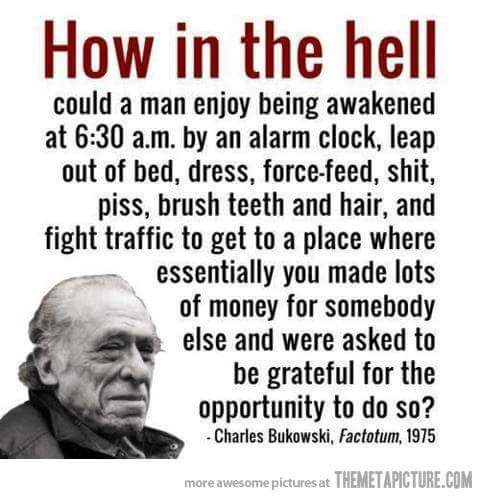
And finally a nice quote from Mr. Bukowski. Those who have more than two properly functioning brain cells should think about his words real f*cking hard:


January 17, 2016

Putin airbrush test

Test freehand airbrush:

• Transfer method ( http://goo.gl/90FjbJ )
• Various reducers
• Highlighting white base paint vs erasing
• Type of paper

Transfer method worked well, but reference must be sharper, more detailed and saturated print for better results.
ComArt reducer did not work well at all with Inspire H2O paint. Vallejo reducer worked excellently. Inspire's own reducer worked best.
Erasing sharp edged white areas and highlights gave better looking result than spraying base white.
Schoellershammer paper blurred ultra-fine lines, while previously used Van Beek Retouch paper (200 grs) worked excellently. Paper size: A4.

Test required 27 drops of H2O paint = 162 drops of reducer.


Jan 17 2016 - virtually framed


Crop of completed airbrush test


The size of this test portrait is A4 (210 x 297 mm). It's not very difficult to airbrush lots of details in a huge painting, but it is a challenge to do the same in a small painting. I actually changed Putin's facial expression and made him look slightly more sarcastic. Compare the airbrush with the reference image you see below. The airbrush portrait could have been taken into more detail, but since this is a test, I stopped at the level that is visible above.


January 11, 2016

Brad Pitt airbrush portrait

I am testing a new approach to portrait airbrushing after watching an other magnificent Clint Eastwood portrait by Alberto Ponno. It incorporates meticulous detailing with very low air pressure and properly diluted paint. Contrary to the previous portrait I sprayed of Andre Hazes, this portrait of Brad Pitt is airbrushed on smooth Van Beek Retouch paper. It does not appreciate erasing very well and does not absorb a bunch of paint, but the smooth surface does allow to spray fine detail. Size of the image itself (i.e. the head) is 25 cm wide, 30 cm tall.

The airbrush I used is my trusty Iwata HP-BH and the paint is Inspire's brilliant H2O water based paint. The portrait is entirely freehand (which means no masking of any sort at all); no color pencils were used to apply accents, only a very limited amount of erasing was used.

Working method: spray the average tones, then apply dark accents and finally spray the highlights (although so far I haven't used the white). I try to airbrush around white areas as much as possible, to keep the necessary spraying with white to a minimum. I used Base White for highlights in the Andre Hazes portrait and was quite pleased with the result. Coverage is good, the paint allows to spray fine lines and it clogs only just a fraction faster than regular colors (cleaning the needle more often than is the case with other colors is required) - I take the needle out of the airbrush and clean it by rolling and sliding it between my fingers that I press together. Thoroughly cleaning the airbrush after spraying with white is done, is a must - the Inspire Base White has very strong adherence.

Sequence shows newest update at the top (text continues below the photos - extensive tips). By clicking one on the photos, the slide show mode is activated, in which the photos can be viewed by using the mouse scroll wheel. Roughly speaking, each update equals 3 drops of paint - so you can get an idea of the amount of paint used for the portrait in each stage. The camera I use, is a lousy cell phone cam of a Samsung S4 Mini, often used in artificial lighting (which makes the quality of the photos even worse...). This portrait being sprayed with Black Smoke (a dark shade of grey), suffers less from the lighting than full color portraits.


Update March 6 2021

Four years after spraying the airbrush portrait I reworked it digitally, using Affinity Designer and Affinity Photo. Skin and hair texture was added using custom created vector brushes and a colour overlay was made. I also cropped the portrait to get an improved focus on his face. Digital editing is very forgiving since the Affinity apps allow to edit in a non-destructive way and the History function allows to remove or edit any random step previously made. These options basically enhance the artist's freedom to work towards the image (s)he envisions without the painstaking effort required in analog art creation. I know that many think digital works are not 'real art', but I don't give a toss, like many others who have become acquainted with the freedom and accuracy that digital programs offer them. Especially the affordable Affinity programs, that won't plunge its buyers straight into poverty (unlike some programs of the competition).


March 6 2021 - added skin and hair vector texture
digitally in Affinity Designer and Affinity Photo


Jan 16 2016 13:30


Jan 15 2016 17:00 - skin texture and hairline


Second update Jan 13 2016 of Brad Pitt portrait. Detailing and correcting textures.
Inspire H2O paint is absolutely brilliant; it allows to spray very thin (saturated) lines
without clogging the airbrush, while it is reasonably easy to erase.
Even on very smooth / slippery paper it is a dream to spray.


Jan 13 2016 10:10


Jan 12 2016 13:00 hrs


Same stage as image below, shot in daylight


Jan 12 2016 01:11


Jan 11 2016


Jan 10 2016 - III


Jan 10 2016 - II


Jan 10 2016 - I


Note for those who try to improve their already good skills but want to reach the next level:
Commonly airbrushes are set up using some type of image projection device. The disadvantage of this method is that only some of the details are transferred (drawn) onto the surface; the rest the artist has to estimate by frequently looking at the reference image. Alberto Ponno has developed a unique method that allows him to have a continuously projected reference on the surface he works on. Alberto has mad skills that are unsurpassed in this dimension today and combined with the perfect reference his method provides, it results in stunning airbrush art. For lesser gods I described a cheap alternative method that works with (semi) transparent surfaces like paper, poly carbonate sheets and canvas. It allows the artist to focus on applying the paint to the surface without the perpetual worry of misplacing the spray and creating an incorrect shape which makes it necessary to correct mistakes afterward.

Paint mix-ratio and air pressure
Another tip some may find useful is, I keep a tiny piece of paper in my left hand (I airbrush with my right hand) that I use to stabilize the jet of paint before attacking the paper or canvas. I keep it very close to where I need to spray and once the stream is stable, I quickly jump over to the surface I paint on. I do this very often, stabilizing for extremely thin lines, as well as wider sprays for surfaces. This way I always know exactly what the effect will be. When diluting the Inspire H2O : reducer = 3 : 18 (drops) and air pressure is just high enough to drive the paint out of the airbrush, I can spray ultra thin lines for hours on end. It is useless to set air pressure using the pressure gauge on the compressor, but as a reference for beginners the hand barely moves over the dial when air is sprayed. I prefer to check air pressure by airbrushing air (no paint) against the back of my left hand. Room temperature and humidity that vary each day affect the required pressure, so using the pressure gauge is pretty much useless.

Tip to continuously spray ultra fine lines
Approximately every 5 minutes I take needle out of the airbrush and clean the tip between my fingers. Below you see an image of my 'warming up' - sprayed on cheap office copying paper - before airbrushing which is meant to get the 'feel' and dexterity to airbrush properly.


Getting the feel of the airbrush and
setting up the gun properly before
the real work on paintings begins.
(The ruler scale is in millimeters)


My experience with Inspire H2O paint
I have been airbrushing since 1980 and tried many brands of paint, but I can safely say both the solvent based and waterborne paints from Inspire are better than the rest, require no chemistry degree to use and are available for a very reasonable price. They adhere to all types of surfaces and as far as I'm able to judge, are very light resistant. All these properties make these paints the best deal in the market today. A truly huge compliment I have to make to the waterborne H2O paint, which does not noticeably behave different than their solvent based paint. Most waterborne paints are no match for their solvent based counterparts, but the only way to distinguish Inspire's products is by the scent of the solvent. The thing that I don't like about the paint are the bottle lids; while it is easy to dose the measure of paint required, when closing the twist top lid, a small amount of spills over or jets into the room (when closed swiftly, which is messy). But in all honesty, I haven't come across a solution that works flawlessly in the decades that I have been airbrushing - The Createx flip lid also spills paint and the pipettes of the Schmincke and Illu-Color type bottles dry out and crumble after some time.

Next project
Actually this portrait is a test to test the limits of the paint, the airbrush, my dexterity, patience and ability to concentrate. The next project will be more realistic (detailed) than this one, 100% freehand as well. I will use additional tools that I didn't have while airbrushing this portrait, which will be explained in that blog entry.