While browsing through old files I found a freehand airbrush of a Native American chief as seen below. I recall using a Vega 1000 airbrush and Illu-Color paint. I did this portrait during a demo for Revell, the company that sells magnificent scale models of all sorts of vehicles. I was in my Native American period and sprayed portraits of Native Americans almost exclusively. Somewhat to the annoyance of the Revell sales persons, but I drew a bigger crowd than the companies from the surrounding booths, so they did not forbid me to spray such portraits.
Revell planned to sell airbrushes and paints that could also be used by the scale model hobbyists. The Vega airbrushes that Revell rebranded to their own products were ok, but their paint was not suited to spray portraits during a demo, because they obviously were tuned for use on scale models. I never tried it for this purpose, but I think they were well suited for it. But I had to spray 8 hours in a row in a demonstration, so I threw away their paint and filled the bottles with Lukas Illu-Color, my favorite brand of paint at the time, excellently suited for use in airbrushes, particularly for T-shirt art because it can be made water resistant when adding Lukas' Textil Medium. Visitors couldn't visually tell the difference between the Revell paint and Illu-Color, so I got away with the switch.
Spraying on T-shirts is the most forgiving way to airbrush. It is in fact difficult to produce spiders - paint slipping over the surface in all directions except the right one. The cloth absorbs most of the paint and you have to spray in one spot for a really long time to make the paint soak the fabric and create a blop that darkens the paint's colour which can't be repaired. T-shirt cloth will absorb most applications of too much paint and thus hide mistakes. In addition subtle fadings are easy to make, which is perfect for portraits as well as really thin lines and spatter texturing. T-shirt cloth allows to almost touch the surface while spraying without risking the paint to land in a different sport than the artist intends.
The show was very busy, it was held in the Jaarbeurshallen in Utrecht in the early nineties of the previous century and the sales people were happy with the public's attention. Next to our booth were people of a company that sold colour pencils, crayons and all sorts of hobby paints, who mingled with the public in front of our stand where I gave the demo. They pretended to be part of the crowd and asked all sorts of stupid questions in an attempt to disrupt the demo. Probably because they though it was funny. When lunch time broke they asked us to guard their booth and went to grab a bite in the giant mall in the Utrecht train station area. That was practically begging for revenge.
We opened their bottles with mediums that they used for their demos and replaced the substances with all sort of fluids we used to get our paint to work - thinner, reducer, flow improvers, ox-gall etc. none of which would suit the purpose that was indicated on the labels. When they gave their demos in the afternoon we mingled among the crowd and pretended to be an interested visitor asking to demonstrate their mediums, which of course ended in a disaster. They soon understood that we had been fiddling about with their stuff and stopped messing up our demonstrations. They never asked us to guard their booth again in the remaining days and did no longer try to disrupt our demos.
It was a good show for Revell and we drew bigger crowds than nearby stands. It was always very busy, we sold a bundle and had a lot of fun. One of our competitors dropped by and asked how we were doing. On of our sales persons boasted that he was the best salesman ever, claiming he could even sell a colour TV to a blind person and a widescreen at that. Word spread quickly among the companies participating in the fair and I guess events like these made us the rogue participant at the show, which made us stand out among all average people hired by the competition.
Brief airbrush resume
.
In the late eighties of the previous century until the first few years of this century I conducted airbrush demos and seminars for Van Beek Graphic Art supplies, mainly the Paasche airbrushes (before they threw product quality out of the window), Bakker Graphic Art Supplies, demonstrating the brilliant Fischer Aerostar, Badger Holland obviously demonstrating their models and the Testor company, demonstrating the innovative Aztek airbrushes, spoken of with disdain by many airbrush artists, me excluded. After that I taught at an airbrush school in Almere where I met many nice people, but the owner of the school put too many students in each class, which made it difficult to give everyone the attention they deserved. Besides that he forgot to pay me more than once. Today I focus more on creating digital art - vector art in particular - but as a therapy do the occasional airbrush now and then.
The man who helped get started in airbrush was Henk Bensdorp of Van Beek Graphic Art Supplies. He not only introduced me to the scene, but also gave me the tools to spray - airbrushes, paints and mediums. Without Henk - who unfortunately is no longer with us - I would never have gotten this far in airbrush art. The above portrait of Bob Marley was a visual thank you for all he had done for me.
Another really old airbrush (early 90's of the previous century if I remember correctly) was the above freehand portrait that I sprayed for a co-worker, using the Paasche V1 airbrush and Rotring Artist Coloro acrylic ink once again. The V1 was stolen years later while attending an other airbrush show. I bought an Iwata HP-BH on the sport with a participant of the show: Airbrush Services Almere that became my trusted and preferred tool later.
Revell planned to sell airbrushes and paints that could also be used by the scale model hobbyists. The Vega airbrushes that Revell rebranded to their own products were ok, but their paint was not suited to spray portraits during a demo, because they obviously were tuned for use on scale models. I never tried it for this purpose, but I think they were well suited for it. But I had to spray 8 hours in a row in a demonstration, so I threw away their paint and filled the bottles with Lukas Illu-Color, my favorite brand of paint at the time, excellently suited for use in airbrushes, particularly for T-shirt art because it can be made water resistant when adding Lukas' Textil Medium. Visitors couldn't visually tell the difference between the Revell paint and Illu-Color, so I got away with the switch.
Spraying on T-shirts is the most forgiving way to airbrush. It is in fact difficult to produce spiders - paint slipping over the surface in all directions except the right one. The cloth absorbs most of the paint and you have to spray in one spot for a really long time to make the paint soak the fabric and create a blop that darkens the paint's colour which can't be repaired. T-shirt cloth will absorb most applications of too much paint and thus hide mistakes. In addition subtle fadings are easy to make, which is perfect for portraits as well as really thin lines and spatter texturing. T-shirt cloth allows to almost touch the surface while spraying without risking the paint to land in a different sport than the artist intends.
 |
| Freehand airbrush portrait of a Native American chief sprayed on T-shirt |
We opened their bottles with mediums that they used for their demos and replaced the substances with all sort of fluids we used to get our paint to work - thinner, reducer, flow improvers, ox-gall etc. none of which would suit the purpose that was indicated on the labels. When they gave their demos in the afternoon we mingled among the crowd and pretended to be an interested visitor asking to demonstrate their mediums, which of course ended in a disaster. They soon understood that we had been fiddling about with their stuff and stopped messing up our demonstrations. They never asked us to guard their booth again in the remaining days and did no longer try to disrupt our demos.
It was a good show for Revell and we drew bigger crowds than nearby stands. It was always very busy, we sold a bundle and had a lot of fun. One of our competitors dropped by and asked how we were doing. On of our sales persons boasted that he was the best salesman ever, claiming he could even sell a colour TV to a blind person and a widescreen at that. Word spread quickly among the companies participating in the fair and I guess events like these made us the rogue participant at the show, which made us stand out among all average people hired by the competition.
 |
| Even older airbrush than the one above also sprayed during a demo for Revell. Image is small because in the early 90's of the previous century cameras all were low res and the battery died after 3 shots |
Brief airbrush resume
.
In the late eighties of the previous century until the first few years of this century I conducted airbrush demos and seminars for Van Beek Graphic Art supplies, mainly the Paasche airbrushes (before they threw product quality out of the window), Bakker Graphic Art Supplies, demonstrating the brilliant Fischer Aerostar, Badger Holland obviously demonstrating their models and the Testor company, demonstrating the innovative Aztek airbrushes, spoken of with disdain by many airbrush artists, me excluded. After that I taught at an airbrush school in Almere where I met many nice people, but the owner of the school put too many students in each class, which made it difficult to give everyone the attention they deserved. Besides that he forgot to pay me more than once. Today I focus more on creating digital art - vector art in particular - but as a therapy do the occasional airbrush now and then.
 |
| Freehand airbrush portrait of Bob Marley sprayed with a Paasche V1 airbrush and Rotring Artist Color acrylic ink for the great, late Henk Bensdorp of Van Beek Graphic Art Supplies. |
 |
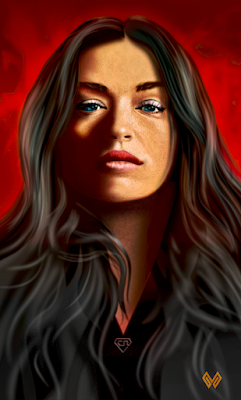
| Freehand airbrush portrait 'Ernesto's mom' |