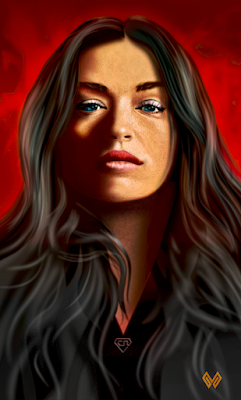
Haven't been posting for a while. Life kept me busy, staying alive mainly. Started a new project some time ago: a vector portrait of Crystal Reed who plays Sophia Falcone in the television series
Gotham. 100% vectors, zero pixels. Created once more in Affinity Designer, no other program was used. Reference photo you find
here. Below I post the progress sequence, which will be slow I suspect. Oldest stage at the bottom, newest at the top. Please bear with me as I complete this portrait, that for the time being is a work in progress.
The face' pores were created with custom brushes that I gave Gaussian blurs, transparencies and in some cases 3D
fx. In some areas over- and underlays were placed that I gave custom fills, transparency and Gaussian blurs. All
fx and strokes were given the property scale with object, so that the portrait can be re-scaled to any size without losing quality and crispness. This was all done using the mouse. The hair will be done with the Huion 610 Pro graphic tablet.
To be brutally honest, the vector brushes aren't actually vectors, because they're based on png bitmaps. To work around the problem of bitmaps not behaving well when rescaled to a size that is different than the one they were drawn in, make the png's big, so that rescaling them to bigger sizes does not have a detrimental effect on their appearance. I don't get why the brushes weren't made in true vectors or svg format, which would probably have avoided this problem, but for the time being, it is what it is. I have an idea how to get around this problem, but that would involve quite a bit of work and as usual, work arounds commonly aren't the best way to resolve issues. But I still have to see if my suspicion actually works. I may come back to this in a future blog entry.
Tip: if you click on an image, you're taken to Google's Lightbox (which are slides basically) that allows you to scroll back and forth through the various stages, that makes it easier to compare the stage differences. On a PC you can use the scroll wheel to flick through the stages, on a tablet you must click the thumbnails at the bottom of the screen and on a smartphone the Lightbox is unfortunately not available.
 |
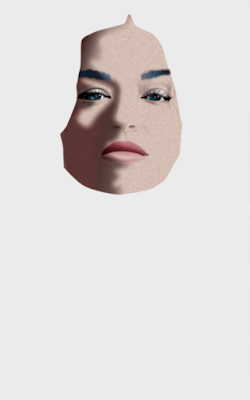
Edited almost a year and a half later.
Changed the upper eyelid of the right
eye, the eye brows, the nose and the
area around the mouth's left corner |
 |
Now I have to put it away and not look
at it, before I apply the final touches . . . |
 |
Drawing the hair is tedious labour
as can be seen in this outline view.
The strokes are intensely edited;
Gradient colour and transparency
are applied to each of them |
 |
Started detailing the hair. Did this with the
mouse because the pen battery was dead. |
 |
Finally I got around to working on this vector portrait again.
Did subtle detailing on the pores and accents, the eyebrows
and increased the height of the portrait. After this I hope to
start on the detailing of the hair and her dress. |
 |
| Outline view of the image above this one. |
 |
Colour testing. Before drawing the hair
strands, a background was drawn for
each area of the strands that share a
common intensity and colour |
 |
| Stage 13 - hair background added |
 |
Stage 12 - accents, highlights, shadows & lip creases
|
 |
| Stage 11 - upper lip details |
 |
| Stage 10 - accents highlights and shadows |
 |
| Stage 9 - working on accents and shadows |
 |
| Stage 8 - added some shadow backgrounds on right side of face |
 |
| Stage 7 - fine tuning location and shape of face components |
 |
| Stage 1 to 6 - setting up face components |


