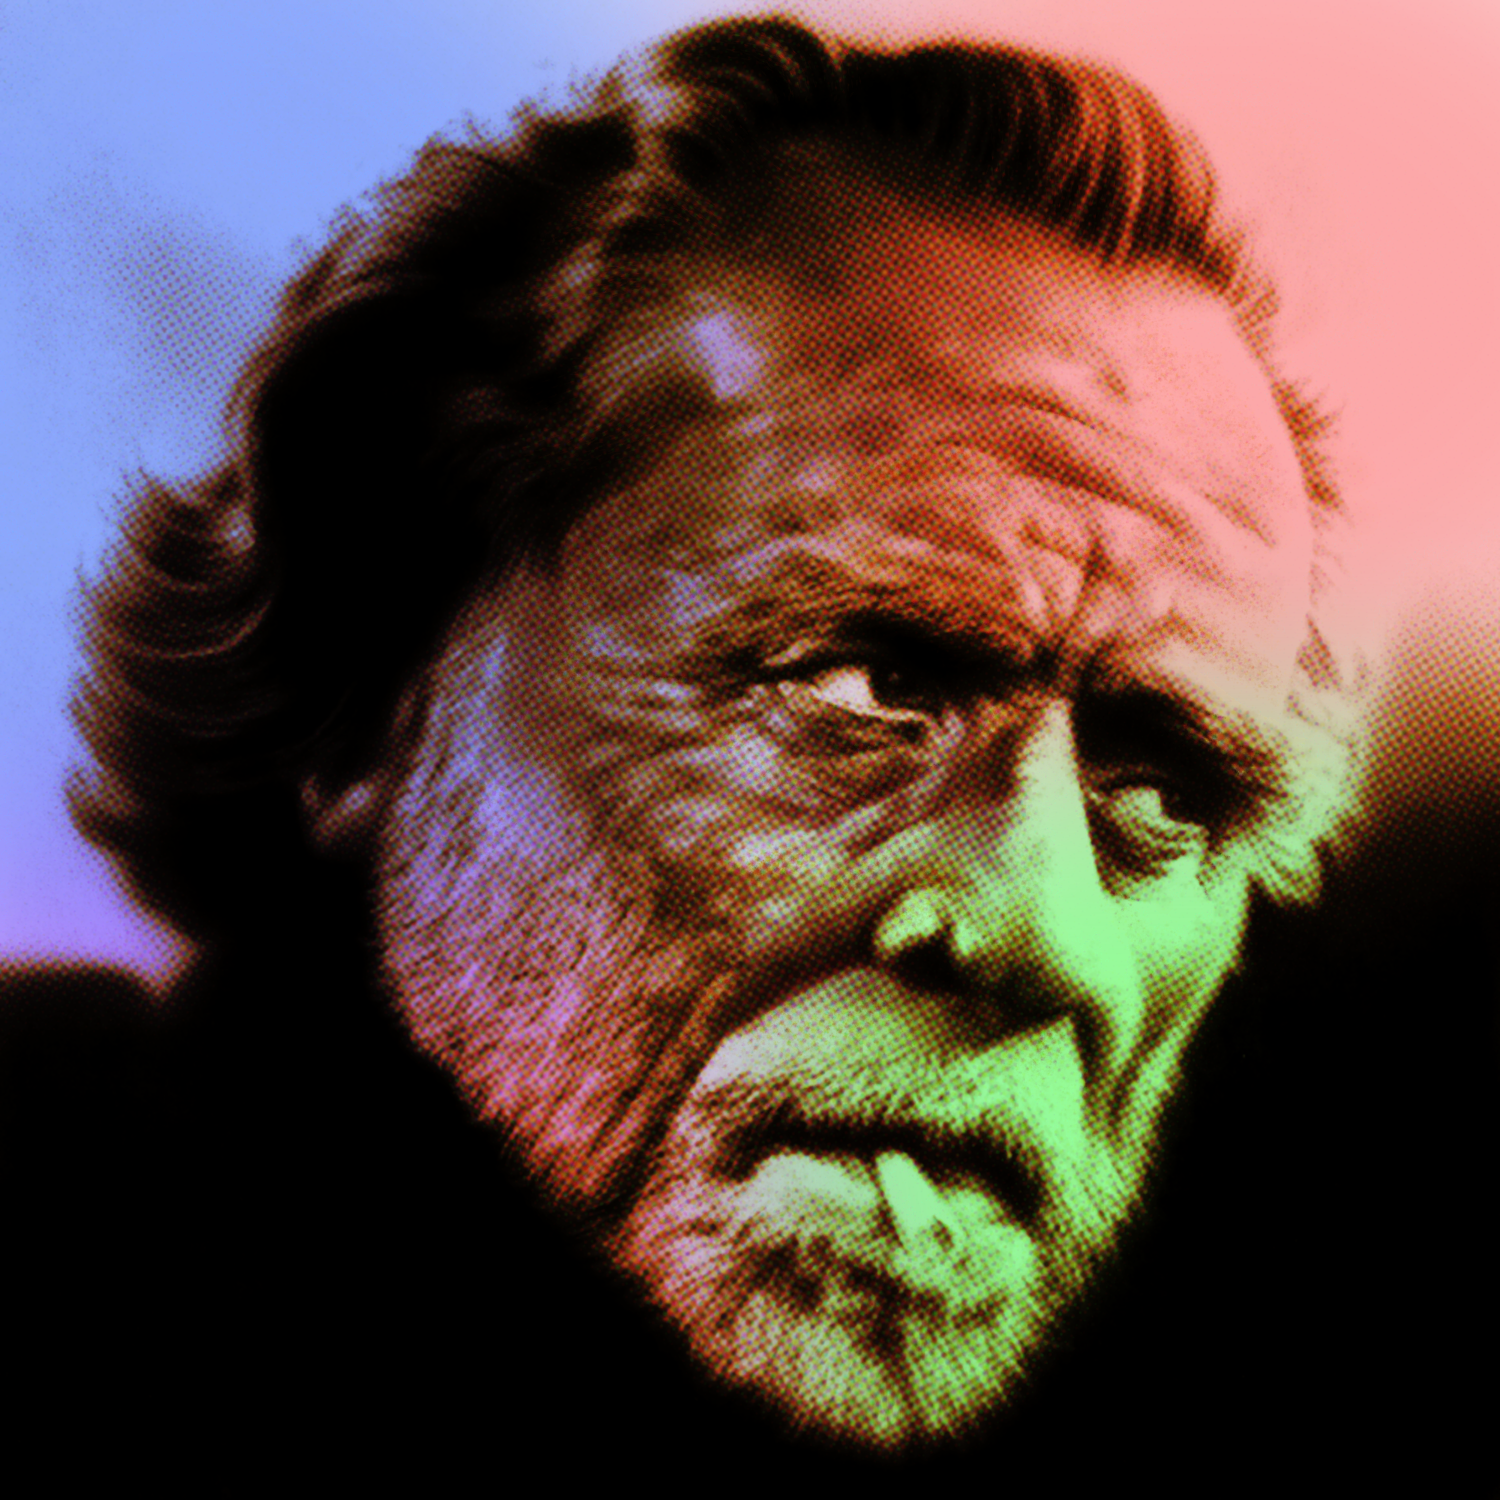
Freehand airbrush portrait of Danny Trejo, work in progress. Started using Vallejo Flow Improver with Inspire H2O. Mix ratio paint : reducer : flow improver = 4 : 12 : 2. The increased viscosity results in less tip dry and slightly longer drying time of the paint, which improve color blend fades. DO NOT use Flow Improver when spraying ultra-fine crisp lines, because the mentioned properties also cause the paint becomes too fluent after it hits the paper and spreads in all directions, which airbrush artists call spidering. The dimensions of the head are approximately 28 x 28 cm. I used an Iwata HP-BH airbrush and Van Beek Graphic Art Supplies Retouche paper.
Oldest stage below, newest on top. By the way, if you click on one of the images, you will see them against a dark background (in Google's 'lightbox') and will be able to scroll through all photographs on a page by turning your mouse's scroll wheel on a PC or Mac. As usual, below the photos additional information concerning this portrait is presented.
| In frame |
 |
| Reworked in July 2022 in Affinity Photo |
 |
| Mar 27 2016 - 14:00 |
 |
| Mar 3 2016 - 12:00 |
 |
| Feb 29 2016 - 13:30 |
 |
| Feb 29 2016 - 12:00 |
 |
| Feb 28 2016 - 21:00 |
Mix-ratio
It occurred to me that a mix-ratio paint : reducer over 1 : 3 doesn't work well with Inspire H2O. For ultra-fine lines 2 drops of reducer for each drop of paint works best. When the paint is diluted beyond the 1 : 3 ratio the paint skids all over the paper surface - the same thing occurs when spraying on canvas. I sprayed this one on wood and acid free smooth paper. It's probably worse on synthetic paper (which I haven't yet tested). But when you stick to the 1 : 2 ratio it is safe; the paint behaves fantastic.
Air pressure
I never look at the dial of the pressure gauge. I just blow air against my hand to find the proper pressure to spray with. I tend to lower the air pressure so that the paint is barely pushed out of the airbrush, but one has to be careful; at some point the airbrush starts to make stipple patterns (which is controllable with intense concentration) and with even lower pressures becomes unpredictable. Also at low pressures, the jet of paint takes a few seconds to stabilize. I keep a small piece of paper in my left hand (I hold the airbrush in my right hand) and after stabilizing 'jump' to the painting surface. I re-stabilize the jet of paint on the small piece of paper very regularly and make sure that the needle is cleaned as often as necessary by taking it out of the airbrush and wiping it clean. Inspire H2O Black Smoke paint stays stable longer than its Base Brown and causes less tip dry, I found out suring spraying.
Removing blots
When a spider forms, it can be removed by quickly dipping the spot with the hand that is not holding the airbrush. This trick leaves no unwanted residue as long as the hand motion is approximately perpendicular to the painting surface. Smearing motion will leave traces.... Mind you, this only works when spraying with very low air pressures that do not deposit a lot of paint on the surface per measure of time.
Working in layers
The master painters of old (dudes like Rembrandt and Vermeer) often used a technique called 'glacis', which means working in transparent layers on top of each other. They knew that working this way created the illusion of depth and allowed subtle color nuances to be achieved that can never be reached in one pass. These tricks that the old masters used, work with the airbrush as well. In fact, the Inspire H2O paints are excellently suited for them. They're transparent, but also have the proper pigment intensity to create great results when working in many layers. It is the exact opposite as T-shirt (speed) painting in which colors are blasted on the tissue in one or two passes at higher air pressures, because the T-shirt fabric absorbs the paint well and spiders will therefore be prevented. But if you like working in more subtle ways on harder and smoother surfaces like paper, airbrush board and canvas, spray in many layers (using a number of different colors).
 |
| This is what the cut-out will look like when framed. |