November 9, 2020

Vin Diesel vector portrait drawn in Affinity Designer


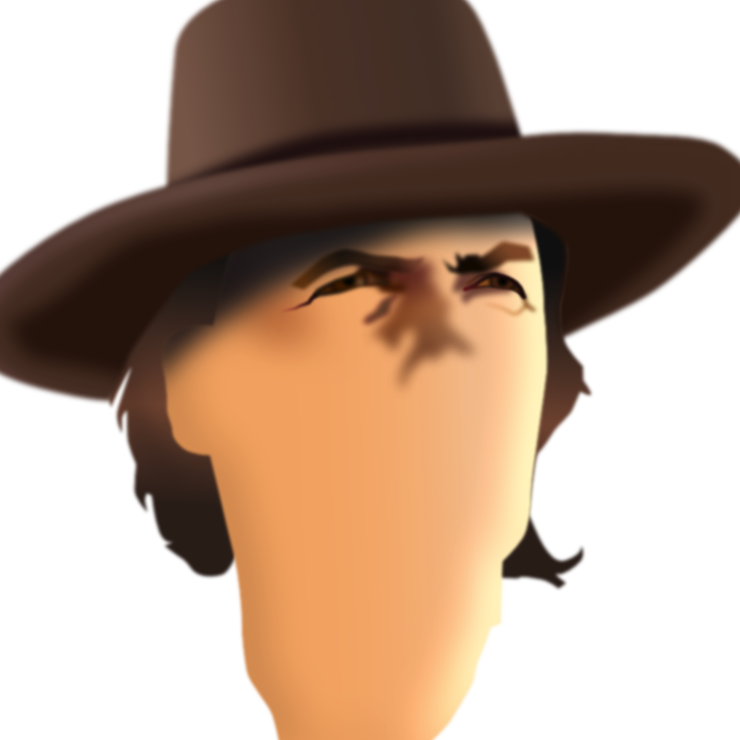
This is a work in progress as of November 10 2020 that I began to create in November 9. I'm in the process of drawing a vector portrait of Vin Diesel, the ultimate cool guy in movies, probably because he's cool in real life as well. It is in the process of being created in Affinity Designer (because it's not finished yet as of November 27 2020), aiming to use as little as possible objects (curves and shapes) as possible in this complex work. Purpose for the time being is to create a graphical image that will be used in a T-shirt design. Like the previous portraits I posted in this blog, I may at some point continue to work on the drawing in the future to make it more realistic by adding textures and more detail (by adding custom made vector brushes). For T-shirt design adding too much detail basically is a waste of time. Check out my vector portraits in my webstite and in this blog. The T-shirt designs I submitted to Redbubble. Stay tuned to see updates leading towards the final product. Oldest stage at the bottom, most recent on top.


A few hints

Many shapes are made of curves - (open ended) lines drawn with the pen tool - to which I added various thicknesses, Gaussian blurs, more or less complex gradients, also for strokes, and gradient transparencies. I also applied multi-level clipping (i.e. object in object in object etc.) of objects which allows to go beyond the the complexity of standard gradient fills. Also HSL hue shifts and Brightness & Contrast effects were applied to them. For more complex shapes I drew the closed line objects and applied the same effects to them as mentioned before. In using these techniques the number of objects can be reduced and all that can be done in pixels that can be done in vectors too. In addition, contrary to bitmap images, vector images can be re-scaled to any size without loss of quality. 


Stage 14


Vector outline of portrait


Stage 13 


Stage 11 


Stage 10 


Stage 09 


Stage 08 


Stage 07 


Stage 06 


Stage 05 


Stage 04 


Stage 03 


Stage 02 


Stage 01 


November 3, 2020

Vector portrait of Robin Williams used in T-shirt design


I like Robin Williams for his smart quotes. I was unaware of the fact that he had passed away a few years ago, probably in sad circumstances when I began drawing. This is a 100% vector portrait of the man not containing a single pixel. Created in Affinity Designer of course. Below is the progress sequence of this drawing; the oldest stage at the bottom, the newest one on top. Also a wireframe view of the vector drawing is included. No extreme detail such as pores, wrinkles and hair texture were included, because it is used in a T-shirt design. I may however add those some time in the future to make the portrait photo realistic. At the very bottom I placed the T-shirt design, based on one of his quotes. Click one of the images to go to Google's lightbox where you can flick through the stages by turning the scroll wheel of you mouse if you are on a PC.


Stage 10


Stage 9


Stage 8


Stage 7


Stage 6


Stage 5


Stage 4


Stage 3


Stage 2


Stage 1


Wireframe view


Vector portrait used in T-shirt design


November 1, 2020

Clint Eastwood in vector T-shirt design


This is a vector portrait of Clint Eastwood created in Affinity Designer. 100% vector, zero pixels. It is a graphical portrait, i.e. it shows his face basic features, without too much details, such as pores, wrinkles and hair texture etc. I may add them some time in future, but for now this is good enough for its current purpose - a T-shirt design, that is available in Redbubble. Below you see the 6 stage (newest on top, oldest at the bottom). Below that you see the vector wireframe view and at the very bottom the T-shirt design image. Actual size of the portrait is 6000 pixels square. Click one of the images to scroll through the stages with your mouse wheel in Google's lightbox (at least you can do this when watching them on a PC).


Update June 8 2021
Tinkering is shown in Stage x and x+1 before which I did several stages to balance the colours and add details all in vector. Stages x and x+1 contain Affinity Photo pixel effects (lighting + bump maps). The vector part of the portrait was created in Affinity Designer and it was later given a lighting filter (with bitmap) in Affinity Photo to make it less smooth. This Stage x and x+1 images will not be used for the T-shirt design because they contain too much detail for T-shirt print machines to handle. The image can still be output at any desired size after which the lighting filter can be applied to the vector drawing. It still needs some work, but I thought I'd place this stage to see the progress.

The texturing is made as follows: Copy objects from Designer into Photo or export them as a png and open them in Photo. There apply Filter-Lighting. Choose Directional and add Bump Map and tinker with the sliders until desired effect is achieved. Then copy back into Designer and move the object(s) to proper Layer level and check that their size matches the drawing. Make sure the canvasses in Designer and Photo are the same size, then you don't have to resize when pasting them back in Designer (which is fiddly). Working in this way you can decide which parts to texturize and which to keep smooth. It also is possible to texture different parts with different bump maps.


Update June 9 2021
In Stage x+2 the skin texture is applied to the face area only. This is an experiment that is not yet finished. The bump map of the applied lighting filter in Affinity Photo can still be improved, but I will do that somewhere in the time ahead. The nature, size and tiling of the bump map need to be improved, but so far the approach itself seems to be promising. By the way, I was given this method of texturing idea by Rory Townsend who has a channel in Youtube, where he posts excellent Affinity Designer and Photo tutorials. The way I did the Stage x+2 was by copying the basic skin layer from Designer in to Photo, where I applied the (Directional) lighting + bump map lighting filter and then copying the result back into Designer in the proper layer rank. The bump map was an image of skin pores.


Stage x+2


Stage x + 1


Stage x


Stage 6 


Stage 5 


Stage 4 


Stage 3 


Stage 2 


Stage 1 


Vector wireframe view (of stage 6)


Used in T-shirt design