December 10, 2019

Range Rover Evoque - vector drawing


I was blown away when first seeing the Range Rover Evoque. Its design is stunning. Perfect in every detail. The designer obviously is brilliant and the fact that the car turned out so beautiful is probably the result of the marketing department not getting in the way. These blokes often are responsible for ruining designs that are a caress to the eye, because they want to please as many (potential clients) as possible. But with a designer capable of creating such a mind-blowing car, Land Rover did well to keep its marketeers on a short leash.


Stage 20 - Dec 11 2019 - 22:11 CET
with transparent background


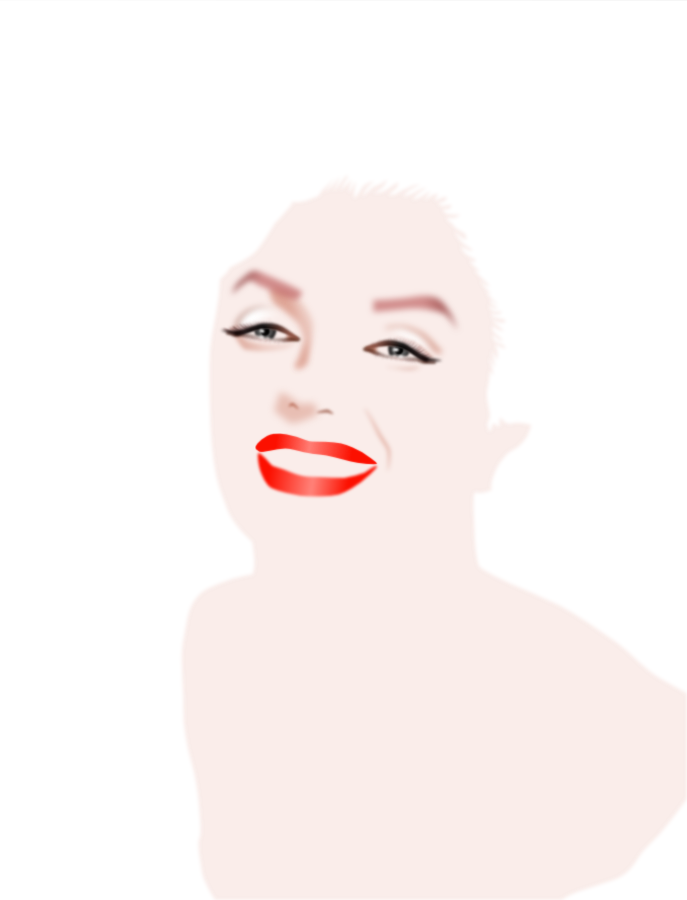
The drawing in wire-frame view looks quite simple; the bulk of the work is to get the gradient colours right and the gradient transparency. They could of course be eye-dropped from the reference photo, but like in my portraits of humans, I like to put more drama in the images I create by altering details in which colours are very important. Another 'problem' in Affinity Designer is to get gradient shadows and reflections right, i.e. when gradients extend in more than one direction. I usually duplicate such an object and change the colours and gradient direction of the duplicated layer (and / or consecutive layers). The unwanted parts I 'remove' by applying custom transparency or by altering the shape of the object (adding or subtracting parts of the object area). B.t.w. all objects are given a Gaussian blur to make the image more realistic. Objects drawn in CorelDRAW or Illustrator often look unrealistic, because of (the object's) hard edges. Artists won't have this problem in affinity Designer.

Drawing such a subject results in many layers. Each object is a separate layer that I gave a specific name in order to make finding a particular object in the layers panel less of a hassle. I lock the reference image on top of all layers and make it transparent, so that I can always choose to see the reference or not while not interfering with other layers. Mind you, you can make the semi transparent reference layer visible, while still being able to draw on a selected layer below it, which is brilliant. I also use the outline view a lot which I gave a custom shortcut to make it possible to quickly switch between normal view and outline view. When having created a bundle of objects it is often quite useful to select the object in outline view (wire-frame view).

A feature not yet included in Affinity Designer is the feather function which would have been quite helpful (and time saving) in creating this image. But I saw Serif put it on the road map of future functions to be added. Although I'm not overly enthusiastic about mesh-fill function (like in CorelDRAW and Illustrator), it may have been useful at some points during the drawing of this car, but again, I saw this on Designer's road map of future functions. Other than that, Affinity Designer allows me to do things very quickly and precisely that I was not able to do equally fast or precise in the programs of the aforementioned competition, which becomes clear in particular in the vector portraits that you find elsewhere on this blog.

I just had to make a drawing of this eye caressing creation. It is a 100% vector drawing made in Affinity Designer. I bundled the first 12 stages in one image to get past the boring level and placed some later stages above that. Click on one of the images to see the stages in Google's Lightbox in which you can scroll through the stages swiftly by turning the scroll wheel of the mouse (on a PC anyway). Oldest stage at the bottom, newer ones above that. I've also made a short clip of this sequence that you find here.


Stage 20 - Dec 11 2019 - 22:11 CET


Stage 19 - Dec 11 2019 - 14:23 CET


Stage 18 - Dec 10 2019 - 19:06 CET


Outline view of stage 18


Stage 16 Dec 9 2019


First 12 stages


Here is an experiment with the video editor 'Olive', my very first try, so bear with me. You may want to take a peek at this video in full screen mode.


November 23, 2019

Digitally edited freehand airbrush of Johan Cruijff


The image below shows a digitally edited photo of Johan Cruijff that originally was a traditional analog freehand airbrush that got sort of 'lost'. Fortunately I had shot a photograph of it that I recently reworked in Affinity Photo. The beefed up digital size is 108 x 82 centimeters. It shows a young Cruijff while he still played for Ajax Amsterdam before he moved to FC Barcelona. Click the image to see a larger version of it in Google's Lightbox.


Edited freehand airbrush of Johan Cruijff


I rarely touch the analog airbrush anymore - the type that needs to be hooked up to a compressor. I believe digital image creation and editing software offer so many advantages over analog means of art creation that it made the choice easy for me. Working with computers does not mean the creative element goes away - there most definitely are methods that allow artists to preserve or even enhance the essence of the person that they portray. It just is a different way of working.

The limitless number of undo and history functions that Affinity programs have, are an obvious plus, while working in layers is an other thing that analog methods do not offer. Being able to work in multiple layers each of which has a wide range of functions is a real boost for artists' creativity. In addition the numerous filters that editing and creating software provide, open up new worlds for creative manipulation of images. All these features put together spurred me to make to make the switch from analog to digital art creation and editing. 

A thing that may cause to think, is that in traditional drawing for instance, artists have 3 tools - a pencil, eraser and paper stump, while the tool boxes of drawing programs offer many more. Also the number of colours are without limit. And these are only the tools; other functions are left unmentioned. In no way am I putting down traditional ways of creating art, I am just beginning to explore the possibilities of digital art creation. So far, I like it a lot. 


October 30, 2019

Marilyn Monroe vector portrait


I've been busy staying alive which did not leave me a lot of time to spend drawing on my computer. But after thinking hard whose portrait to draw in Affinity Designer, I decided upon one of my all time favorites: Marilyn Monroe. When starting to draw, I was not sure if I would detail it into the extreme, like drawing pores and single strands of hair for instance, which would have required some imagination since the reference photo isn't showing any of these details. While progressing I began to lean more towards creating a visual impression rather than creating a photo realistic image. The impression being a soft, dreamy image. The original dimensions of this portrait are height x width = 165 x 126 cm, but since it is drawn in vectors only it can be re-scaled to any desired size without losing quality.

Oldest stage at the bottom, newer stages above that in chronological order. Click on one of the images and Blogger will take you to Google's Lightbox that will allow you to scroll (with the mouse scroll wheel) through the images and make quick compares between the various stages. This will work on a PC or Mac only; tablets and smartphones unfortunately do not offer this option. Enjoy and stay tuned to observe the future progress.


This is what the portrait would look like
when printed and placed inside a frame


Stage 20 November 4 2019 - 15:35
Changed right side neck texture next
to the ear ring and changed colour of
her dress slightly


Stage 19 November 3 2019 - 10:16


Stage 17 November 2 2019 - 15:30


Wireframe


Stage 16 October 1 2019 - 23:23


Stage 14 November 1 2019 - 11:11


Stage 13 October 31 2019 - 21:09


Stage 12 October 31 2019 - 19:19


Stage 11 - October 30 2019 21:53


Stage 10


Stage 9


Stage 8


Stage 7


Stage 6


Stage 5


Stage 4


Stage 3


Stage 2


Stage 1


September 25, 2019

Changing Native American portrait

I used to airbrush a lot - the analogue type in which a real metal airbrush is hooked up to a compressor to spray real paint on a real surface. That started in the early 80's of the previous century and lasted until approximately 8 to 10 years ago. After that I became more interested in digital image creation and manipulation, also because the programs became better and allowed to approach the quality that traditional airbrushing did. Today, the quality of the digital image creation programs has surpassed the traditional way of working in the sense that it is able to create more accurate detail that, in addition, can be edited endlessly.

I used to mainly use CorelDRAW and Corel PhotoPaint for my personal projects and during the day worked professionally with the Adobe products in the office. Sometimes I used Illustrator and Photoshop for my personal projects as well, but I always found their programs way overpriced. Things got worse when they imposed their subscription model on their users after which I switched to Serif's Affinity Designer (vector drawing program) and Affinity Photo (pixel creating and editing program). I accidentally ran into these programs when aimlessly browsing the Internet.

I've truly fallen in love with the Affinity programs that both cost about 50 USD that give you ownership of the programs and 3 free updates.... That is a whole lot more affordable than the programs in the Adobe suit. Designer and Photo are developing well - bugs are continuously removed and functions are added - which causes them to almost be on par with AI and PS functions wise, while having surpassed them in a certain number of aspects. I may elaborate on this in a future blog entry. In addition Serif issued Affinity Publisher which is and InDesign competitor. Already now Publisher is sufficiently equipped with functions to do by far the most DTP work very well while only lacking compared to ID in very specialist areas like interactive digital publications for instance. But artists that work in that type of document creation are relatively small numbered.

OK, back to what I was going to express here. Sometimes when I get bored, I tinker with images in Affinity Photo. In the old days I used to airbrush a lot of portraits of Native American people. But when browsing the web, it occurred to me that many artists create portraits of the same people, simply because there weren't too many photographers to record faces of Native American people in the old days. In order to create a unique face one has to be created from scratch or an existing one has to be changed so that it looks nothing like the original, trying to preserve the ethnic facial traits of the subject. Gertrude Kasebier and Edward S. Curtis are two of the best known magnificent photographers who shot a large number of great Native American portraits. But in their day, it wasn't like everyone had a camera on their smartphone like people have these days. It is why a relatively small number of genuine photographs of Native Americans exist.

So when I find a photo of a Native American person that I potentially would like to airbrush, but I find elements in their facial traits that I would like to change, I load the photo into Affinity Photo and start tinkering. Some would say that this is historic fraud, which in fact is the case to a certain extent, but that could also be said of the paintings of the brilliant Howard Terpning who I am sure interprets some things according to his personal vision (which is what makes his art so awesome). Personally I enjoy watching Terpning's work. Perhaps a little more and focused on details than the average person, because I want to know where the beauty of art is hiding in the details.

Below you find a brief sequence of me changing a portrait that I found on the web. At the bottom is the original photo. Above that the alterations made in Affinity Photo - mainly using the Liquify Push Forward Tool in the Liquify Persona. The image above that shows more detailing done with the Paint Brush Tool (using a textured brush), The Blur Brush Tool and the Clone Brush Tool. I also used the Color Adjustment and Curve Adjustment filters to make the image more crisp and dramatic. Finally I placed the edited image in a frame in the 3D program Rhinoceros v5 as show in the image at the top. I enjoyed doing this piece of historic fraud that I think turned out quite well considering the original photo was small and of a low resolution (600 x 938 pixels), while damages were present both in the face and in the background.

Tip: click on one of the image and it will be displayed in Google's Lightbox. If you are on a PC (also possible on a Mac I presume) you can turn the scroll wheel of your mouse and flick through the images to compare them.


Placed the edited image in a virtual 3D frame


Image edited with Paint-, Blur- and Clone- Brush tools
to add detail and Colour and Curve Adjustment filters
to make the image more crisp and dramatic looking


Photo edited with the Liquify tool and
Blur tool to remove jagged edges on areas


Reference photo, which was small, low res,
damaged and jagged


August 31, 2019

Old demo airbrush on T-shirt

While browsing through old files I found a freehand airbrush of a Native American chief as seen below. I recall using a Vega 1000 airbrush and Illu-Color paint. I did this portrait during a demo for Revell, the company that sells magnificent scale models of all sorts of vehicles. I was in my Native American period and sprayed portraits of  Native Americans almost exclusively. Somewhat to the annoyance of the Revell sales persons, but I drew a bigger crowd than the companies from the surrounding booths, so they did not forbid me to spray such portraits.

Revell planned to sell airbrushes and paints that could also be used by the scale model hobbyists. The Vega airbrushes that Revell rebranded to their own products were ok, but their paint was not suited to spray portraits during a demo, because they obviously were tuned for use on scale models. I never tried it for this purpose, but I think they were well suited for it. But I had to spray 8 hours in a row in a demonstration, so I threw away their paint and filled the bottles with Lukas Illu-Color, my favorite brand of paint at the time, excellently suited for use in airbrushes, particularly for T-shirt art because it can be made water resistant when adding Lukas' Textil Medium. Visitors couldn't visually tell the difference between the Revell paint and Illu-Color, so I got away with the switch.

Spraying on T-shirts is the most forgiving way to airbrush. It is in fact difficult to produce spiders - paint slipping over the surface in all directions except the right one. The cloth absorbs most of the paint and you have to spray in one spot for a really long time to make the paint soak the fabric and create a blop that darkens the paint's colour which can't be repaired. T-shirt cloth will absorb most applications of too much paint and thus hide mistakes. In addition subtle fadings are easy to make, which is perfect for portraits as well as really thin lines and spatter texturing. T-shirt cloth allows to almost touch the surface while spraying without risking the paint to land in a different sport than the artist intends.


Freehand airbrush portrait of a Native American chief sprayed on T-shirt


The show was very busy, it was held in the Jaarbeurshallen in Utrecht in the early nineties of the previous century and the sales people were happy with the public's attention. Next to our booth were people of a company that sold colour pencils, crayons and all sorts of hobby paints, who mingled with the public in front of our stand where I gave the demo. They pretended to be part of the crowd and asked all sorts of stupid questions in an attempt to disrupt the demo. Probably because they though it was funny. When lunch time broke they asked us to guard their booth and went to grab a bite in the giant mall in the Utrecht train station area. That was practically begging for revenge.

We opened their bottles with mediums that they used for their demos and replaced the substances with all sort of fluids we used to get our paint to work - thinner, reducer, flow improvers, ox-gall etc. none of which would suit the purpose that was indicated on the labels. When they gave their demos in the afternoon we mingled among the crowd and pretended to be an interested visitor asking to demonstrate their mediums, which of course ended in a disaster. They soon understood that we had been fiddling about with their stuff and stopped messing up our demonstrations. They never asked us to guard their booth again in the remaining days and did no longer try to disrupt our demos.

It was a good show for Revell and we drew bigger crowds than nearby stands. It was always very busy, we sold a bundle and had a lot of fun. One of our competitors dropped by and asked how we were doing. On of our sales persons boasted that he was the best salesman ever, claiming he could even sell a colour TV to a blind person and a widescreen at that. Word spread quickly among the companies participating in the fair and I guess events like these made us the rogue participant at the show, which made us stand out among all average people hired by the competition.


Even older airbrush than the one above
also sprayed during a demo for Revell.
Image is small because in the early 90's
of the previous century cameras all were
low res and the battery died after 3 shots


Brief airbrush resume
. 
In the late eighties of the previous century until the first few years of this century I conducted airbrush demos and seminars for Van Beek Graphic Art supplies, mainly the Paasche airbrushes (before they threw product quality out of the window), Bakker Graphic Art Supplies, demonstrating the brilliant Fischer Aerostar, Badger Holland obviously demonstrating their models and the Testor company, demonstrating the innovative Aztek airbrushes, spoken of with disdain by many airbrush artists, me excluded. After that I taught at an airbrush school in Almere where I met many nice people, but the owner of the school put too many students in each class, which made it difficult to give everyone the attention they deserved. Besides that he forgot to pay me more than once. Today I focus more on creating digital art - vector art in particular - but as a therapy do the occasional airbrush now and then.


Freehand airbrush portrait of Bob Marley
sprayed with a Paasche V1 airbrush and
Rotring Artist Color acrylic ink for the
great, late Henk Bensdorp of Van Beek
Graphic Art Supplies.


The man who helped get started in airbrush was Henk Bensdorp of Van Beek Graphic Art Supplies. He not only introduced me to the scene, but also gave me the tools to spray - airbrushes, paints and mediums. Without Henk - who unfortunately is no longer with us - I would never have gotten this far in airbrush art. The above portrait of Bob Marley was a visual thank you for all he had done for me.


Freehand airbrush portrait 'Ernesto's mom'


Another really old airbrush (early 90's of the previous century if I remember correctly) was the above freehand portrait that I sprayed for a co-worker, using the Paasche V1 airbrush and Rotring Artist Coloro acrylic ink once again. The V1 was stolen years later while attending an other airbrush show. I bought an Iwata HP-BH on the sport with a participant of the show: Airbrush Services Almere that became my trusted and preferred tool later.


August 7, 2019

Crystal Reed 100% vector portrait


Haven't been posting for a while. Life kept me busy, staying alive mainly. Started a new project some time ago: a vector portrait of Crystal Reed who plays Sophia Falcone in the television series Gotham. 100% vectors, zero pixels. Created once more in Affinity Designer, no other program was used. Reference photo you find here. Below I post the progress sequence, which will be slow I suspect. Oldest stage at the bottom, newest at the top. Please bear with me as I complete this portrait, that for the time being is a work in progress.

The face' pores were created with custom brushes that I gave Gaussian blurs, transparencies and in some cases 3D fx. In some areas over- and underlays were placed that I gave custom fills, transparency and Gaussian blurs. All fx and strokes were given the property scale with object, so that the portrait can be re-scaled to any size without losing quality and crispness. This was all done using the mouse. The hair will be done with the Huion 610 Pro graphic tablet.

To be brutally honest, the vector brushes aren't actually vectors, because they're based on png bitmaps. To work around the problem of bitmaps not behaving well when rescaled to a size that is different than the one they were drawn in, make the png's big, so that rescaling them to bigger sizes does not have a detrimental effect on their appearance. I don't get why the brushes weren't made in true vectors or svg format, which would probably have avoided this problem, but for the time being, it is what it is. I have an idea how to get around this problem, but that would involve quite a bit of work and as usual, work arounds commonly aren't the best way to resolve issues. But I still have to see if my suspicion actually works. I may come back to this in a future blog entry.

Tip: if you click on an image, you're taken to Google's Lightbox (which are slides basically) that allows you to scroll back and forth through the various stages, that makes it easier to compare the stage differences. On a PC you can use the scroll wheel to flick through the stages, on a tablet you must click the thumbnails at the bottom of the screen and on a smartphone the Lightbox is unfortunately not available.


Edited almost a year and a half later.
Changed the upper eyelid of the right
eye, the eye brows, the nose and the
area around the mouth's left corner


Now I have to put it away and not look
at it, before I apply the final touches . . .


Drawing the hair is tedious labour
as can be seen in this outline view.
The strokes are intensely edited;
Gradient colour and transparency
are applied to each of them


Started detailing the hair. Did this with the
mouse because the pen battery was dead.


Finally I got around to working on this vector portrait again.
Did subtle detailing on the pores and accents, the eyebrows
and increased the height of the portrait. After this I hope to
start on the detailing of the hair and her dress.


Outline view of the image above this one.


Colour testing. Before drawing the hair
strands, a background was drawn for
each area of the strands that share a
common intensity and colour


Stage 13 - hair background added


Stage 12 - accents, highlights, shadows & lip creases


Stage 11 - upper lip details


Stage 10 - accents highlights and shadows


Stage 9 - working on accents and shadows


Stage 8 - added some shadow backgrounds on right side of face


Stage 7 - fine tuning location and shape of face components


Stage 1 to 6 - setting up face components