January 21, 2021

View to a kill - Jaguar vs caiman vector drawing


Recently I discovered a stunning photograph shot by Justin Black, showing a view to a kill; a jaguar catching a caiman in the tropical rainforest of the Amazon. This predator hunt predator moment has a vigorous impact on those looking at the image (this would be a normal person's reaction anyway). Being a witness of a kill, has the tendency to cause neurons to fire a barrage of impulses, generating gamma brainwave patterns in response to perceiving the brutal event, especially when watching the motions in a video that accompanies the photo on the National Geographic website. Such things did occur within my upstairs department, after which I felt compelled to make a vector drawing of it. At the time of the most recent update - January 24 2021, it is still a work in progress, but at this stage it is already visible where it is going. As usual, I created this vector art in Affinity Designer, Serif's magnificent vector drawing program, that can be purchased for just 50 Euro, a one time fee without the rip off recurring subscription payments.

Like I usually do, I changed some features of the image, to enhance its optical affect. I altered some of the jag's facial traits (made its eyes look more leopard like) to make that part of the drawing easier on the eye and will arrange the background in such a way that it does not interfere with the battle of the beasts. Also I placed the jag's tail on the opposite side of its body relative to how it was in the photo to make the composition more balanced. I am still undecided about the cut out format; the photograph is taller, showing more of the scene, but I assume this matter will sort itself out in time or I could simply make more than one version of this work. For the moment I chose a panoramic lay-out, because I may use it as a header image in my website. There you find my portfolio that is distinguished from most vector art collections, by the way, in that I use vector drawing programs to create mainly organic shapes, for which these types of applications are unfit as most 'experts' would say. I am also considering to make both a graphic version and a more realistic version, if I ever get around to draw the latter, which remains uncertain even in times of lockdowns that cause people to become bored senseless.

Upto now, I've exclusively used the mouse to draw (it is a slow tool, but very accurate), but at a later stage I may use my Huion 610 Pro tablet to add the jag's fur texture and perhaps some of the caiman's scales to elevate the image quality and give it a near photo realistic appearance. Before reaching that phase, I focus on establishing the base, which already has some level of detail intricacy. A thing to take into account is that at stage 12 already over 500 layers (curves or objects) have been created, a number that will rapidly increase when using a tablet. It is necessary to give key layers a name and colour code them to keep control over where I am working in Affinity Designer's Layers Panel, and it requires alertness and a logical approach to properly navigate and draw in the complex object hierarchy. When the drawing will be completed, I will add the vector outline image, from which those familiar with vector drawing will be able to get an idea of the power of the Affinity Designer program.

Click the image to see all of them in Google's lightbox, a manually operable slide show. It allows you to swiftly flick through the various stages by turning the scroll wheel of the mouse. This lightbox allows to compare the stages visually like nothing else does and quickly see the changes applied. Unfortunately this function can only be accessed on PC's, Macs or laptops and not on tablets and smart phones (as far as I am aware). Newest stage is on top, oldest at the bottom. Please check in regularly as I continue to post new stages in this article, until the image is done. Text updates will be placed below Stage 1 at the end of this blog entry. Enjoy your visit to this page and feel free to do some more browsing in my blog and if you like it, spread the word and perhaps even blog about this blog. I will of course return the favour. Have a nice day. 


Update February 18 2021

Below you see the next version, edited in RawTherapee, an absolutely brilliant open source image editor, that gives Adobe Lightroom a run for its money. In fact, in many respects it is better than the industry standard, while offered for free. Besides offering outlandishly good and easy to operate editing and batch editing functionality, it allows to catalog images, which are the same functions Lightroom has. Artists chased away by Adobe's wretched subscription model, should definitely give this excellent program a try, most of whom certainly won't be sorry for giving it a test run.

I removed the foreground drawings (the snake and the monkey), because I felt it took the focus of the main part of the image, to which I did some more vector detail editing.

I saved the drawing with history, which should make turning it in to a tutorial in the future somewhat easier. But I still have to familiarise myself with video editing. Plus, as usual, the future remains at least as unpredictable as winning lottery numbers. Which particularly applies to the future in these sinister times. 


Stage 27 - edited with RawTherapee


Stage 21 - graphic version


Stage 15


Stage 14


Stage 13


Stage 12


Stage 11


Stage 10


Stage 9


Stage 8


Stage 7


Stage 6


Stage 5


Stage 4


Stage 3


Stage 2


Stage 1


Stage 16 vector outline


Update January 31 2021

After stage 21, I think I went a little bit overboard, which probably is something many designers recognize. To stop drawing at the right moment, remains a difficult decision (for me at least). Fortunately, Affinity Designer is a non-destructive program that allows to revert to previous stages without problem; layers can be switched on and off at will and the history function allows to remove any step necessary, apart from the 1000 standard undo's. I will therefore leave the design for the time being and later focus on enhancing the textures somewhere in the future. Meanwhile I will start drawing other things.


November 9, 2020

Vin Diesel vector portrait drawn in Affinity Designer


This is a work in progress as of November 10 2020 that I began to create in November 9. I'm in the process of drawing a vector portrait of Vin Diesel, the ultimate cool guy in movies, probably because he's cool in real life as well. It is in the process of being created in Affinity Designer (because it's not finished yet as of November 27 2020), aiming to use as little as possible objects (curves and shapes) as possible in this complex work. Purpose for the time being is to create a graphical image that will be used in a T-shirt design. Like the previous portraits I posted in this blog, I may at some point continue to work on the drawing in the future to make it more realistic by adding textures and more detail (by adding custom made vector brushes). For T-shirt design adding too much detail basically is a waste of time. Check out my vector portraits in my webstite and in this blog. The T-shirt designs I submitted to Redbubble. Stay tuned to see updates leading towards the final product. Oldest stage at the bottom, most recent on top.


A few hints

Many shapes are made of curves - (open ended) lines drawn with the pen tool - to which I added various thicknesses, Gaussian blurs, more or less complex gradients, also for strokes, and gradient transparencies. I also applied multi-level clipping (i.e. object in object in object etc.) of objects which allows to go beyond the the complexity of standard gradient fills. Also HSL hue shifts and Brightness & Contrast effects were applied to them. For more complex shapes I drew the closed line objects and applied the same effects to them as mentioned before. In using these techniques the number of objects can be reduced and all that can be done in pixels that can be done in vectors too. In addition, contrary to bitmap images, vector images can be re-scaled to any size without loss of quality. 


Stage 15 - fixed his ears, added texture


Stage 14


Vector outline of portrait


Stage 13 


Stage 11 


Stage 10 


Stage 09 


Stage 08 


Stage 07 


Stage 06 


Stage 05 


Stage 04 


Stage 03 


Stage 02 


Stage 01 


November 3, 2020

Vector portrait of Robin Williams used in T-shirt design


I like Robin Williams for his smart quotes. I was unaware of the fact that he had passed away a few years ago, probably in sad circumstances when I began drawing. This is a 100% vector portrait of the man not containing a single pixel. Created in Affinity Designer of course. Below is the progress sequence of this drawing; the oldest stage at the bottom, the newest one on top. Also a wireframe view of the vector drawing is included at the lowest level. No extreme detail such as pores, wrinkles and hair texture were included, because it is used in a level below the stages. I may however add those some time in the future to make the portrait photo realistic. At the very bottom I placed the T-shirt design, based on one of his quotes at the very bottom of this article. Click one of the images to go to Google's lightbox where you can flick through the stages by turning the scroll wheel of you mouse if you are on a PC. When you're done, click beside the images to return to this page.


Stage 11


Stage 10


Stage 9


Stage 8


Stage 7


Stage 6


Stage 5


Stage 4


Stage 3


Stage 2


Stage 1


Wireframe view


Vector portrait used in T-shirt design


November 1, 2020

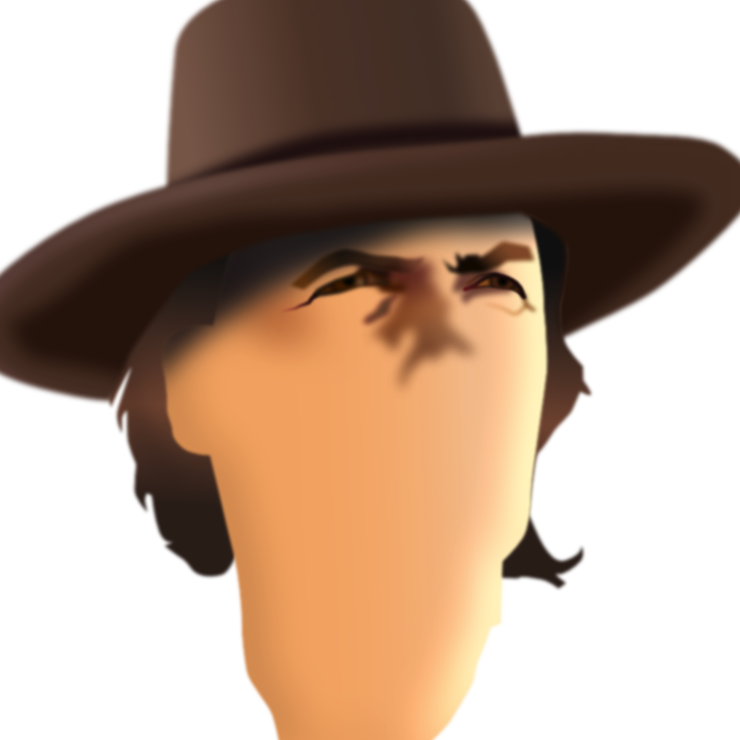
Clint Eastwood in vector T-shirt design


This is a vector portrait of Clint Eastwood created in Affinity Designer. 100% vector, zero pixels. It is a graphical portrait, i.e. it shows his face basic features, without too much details, such as pores, wrinkles and hair texture etc. I may add them some time in future, but for now this is good enough for its current purpose - a T-shirt design, that is available in Redbubble. Below you see the 6 stage (newest on top, oldest at the bottom). Below that you see the vector wireframe view and at the very bottom the T-shirt design image. Actual size of the portrait is 6000 pixels square. Click one of the images to scroll through the stages with your mouse wheel in Google's lightbox (at least you can do this when watching them on a PC).


Update June 8 2021
Tinkering is shown in Stage x and x+1 before which I did several stages to balance the colours and add details all in vector. Stages x and x+1 contain Affinity Photo pixel effects (lighting + bump maps). The vector part of the portrait was created in Affinity Designer and it was later given a lighting filter (with bitmap) in Affinity Photo to make it less smooth. This Stage x and x+1 images will not be used for the T-shirt design because they contain too much detail for T-shirt print machines to handle. The image can still be output at any desired size after which the lighting filter can be applied to the vector drawing. It still needs some work, but I thought I'd place this stage to see the progress.

The texturing is made as follows: Copy objects from Designer into Photo or export them as a png and open them in Photo. There apply Filter-Lighting. Choose Directional and add Bump Map and tinker with the sliders until desired effect is achieved. Then copy back into Designer and move the object(s) to proper Layer level and check that their size matches the drawing. Make sure the canvasses in Designer and Photo are the same size, then you don't have to resize when pasting them back in Designer (which is fiddly). Working in this way you can decide which parts to texturize and which to keep smooth. It also is possible to texture different parts with different bump maps.


Update June 9 2021
In Stage x+2 the skin texture is applied to the face area only. This is an experiment that is not yet finished. The bump map of the applied lighting filter in Affinity Photo can still be improved, but I will do that somewhere in the time ahead. The nature, size and tiling of the bump map need to be improved, but so far the approach itself seems to be promising. By the way, I was given this method of texturing idea by Rory Townsend who has a channel in Youtube, where he posts excellent Affinity Designer and Photo tutorials. The way I did the Stage x+2 was by copying the basic skin layer from Designer in to Photo, where I applied the (Directional) lighting + bump map lighting filter and then copying the result back into Designer in the proper layer rank. The bump map was an image of skin pores.


Stage x+2


Stage x + 1


Stage x


Stage 6 


Stage 5 


Stage 4 


Stage 3 


Stage 2 


Stage 1 


Vector wireframe view (of stage 6)


Used in T-shirt design