November 12, 2022

Serif released version 2 of the Affinity programs


Introduction
Apart from raving reviews about Affinity's version 2 update by users that have not encountered difficulty installing the programs, there are installation problems for a number of users of the Windows platform that should not have occurred. After having waited for a long time to be able to download an upgrade that was not a Beta version, expectations of version 2 were quite high and running into problems installing the programs caught me and many other users by surprise. In this blog entry I will offer a constructive contribution to (temporarily) resolve this problem, expecting a company release soon that will enable successful installation, this being a situation that Serif must put behind them as soon as possible.

On the Affinity forum several work arounds have been suggested, most of which do not work for most users struck by the problem, which tempts people like me to search for other solutions that actually do work. Below you find one that resolved the problem I ran into, although I am aware that changes in the installation code have to be applied in order to avoid users having to apply work arounds or figure out themselves what to do, to install the version 2 programs of the Affinity suit successfully right out of the box. In this blog entry I will focus on Affinity Designer predominantly, since it is the suit's program that I used most often.


Programs will not install
The long awaited release of version 2 of Affinity Designer, Photo and Publisher has recently taken place. I purchased and downloaded them from the Affinity forum, but when I tried to install them I received a message that the installation was cancelled because an error occurred in parsing the apps (all three of them). The file format of the installation was msix. When browsing the forum I soon learned that this affected other users too. Several possible solutions were offered by the mods and advanced users, but none of them cured the problem for me. Later I downloaded the apps from the Microsoft Store, which was the beginning of a solution, since at least .exe-files were placed in WindowsApp directory in the Windows User directory, which isn't the location where Windows users, accustomed to the traditional installation process would expect the files to be placed.

The programs would only open by right clicking the .exe-file from the WindowsApp directory in the system disk and choosing the run as administrator option. They would not start from the Start menu or from the shortcut icons that I placed on the Taskbar. Also I was unable to open files I had drawn in the older Beta versions by dragging them from Windows Filemanager onto the desktop of the programs.

When diving into the problem at a certain point I discovered that the properties of the Affinity (sub)directories in the WindowsApps directory displayed a message that the Permission file was corrupted (in bold red type). I set the permissions to full control for myself and after that the programs opened without using the Run As Administrator command, from both the Start menu and the shortcuts I placed on the Taskbar.

Apparently the .msix files interfered with the user permissions of the Affinity (sub)directories in the WindowsApps directory, necessary to run the programs properly. This directory is located at C:\Users\UserName\Downloads on a Windows 10 system, in which the Affinity programs are in directories with the following name: affinity-designer-2.0.0.msix, in this case for Designer. After running the exe-files from this directory users are prompted to one time fill in their Affinity ID information and the programs appear in the Start menu from where they can be pinned to the Taskbar. Fortunately this problem does not affect all users, but to those that encounter this problem, it is a rather painful disappointment. 


Affinity Designer 2 start up screen


First impressions
I had become curious to the functionality increase of the version 2 programs after watching various Youtube videos that featured them and I must say I was happy to try them. There still are functions missing in Designer that are included in programs of the competition - such as the Mesh gradient tool (which I personally do not miss), the vector trace tool (that I never use), the shape blender tool (which would be nice), the vector eraser and liquify tools and the stroke width tool to name just a few, but overall the upgrades work well and I think they are somewhat worth the money, though Serif could have included more new tools. There is a temporary discount for buying all programs in the suit, a package deal, which is why I hesitantly decided to upgrade. It is a €120 one time payment - no subscription fee - for the entire suit, by the way.


Affinity Photo 2 start up screen


The shape builder tool is a long awaited function that the devs added, the knife / scissors tool as well and the versatile warp tool are absolutely great. In addition the UI has been improved, in particular the Layers panel. Check out the Affinity channel on Youtube, The Affinity Revolution channel, The Brown Bear channel, the Design made simple channel, Olivio Sarkas' channel, the Games From Scratch channel and Kru Mark's channel to get an idea of what the version 2 upgrade is all about. All these persons did an excellent job of exploring the version 2 programs from their own perspective, providing arguments for users to upgrade or not.


The problems for the developers
Kru Mark compares the upgrade to the functionality of Affinity's competition and there still are some tools missing that are included in Illustrator and Inkscape for instance, but for the type of work I create, they are not crucial. I am aware of the fact however, that there are users that would benefit from the missing functions as mentioned by Kru Mark. The improvements the devs actually did include in this version are a welcome addition and perhaps other improvements will be included in the upcoming Beta versions. But not including them in this version, is somewhat of a missed opportunity.

I think Serif was under a lot of pressure to release version 2, because it has been a rather long time since they released the previous upgrade, but I assume the stability of the programs in the suit is a major prerequisite, meaning more time and effort goes into programming and testing. But because Serif did not provide any information why the upgrade took so long, some users wondered if Affinity was dead...., a situation that could have been avoided by keeping users up to date concerning the development of version 2. Had Serif come up with buggy programs in its suit it might have resulted in a bad reputation that is extremely difficult to repair and therefore bad for business. Also the necessity of coding 3 programs to the next upgrade level simultaneously, may have accounted for the lengthy upgrade interval. 

Perhaps because of all these factors, the pressure on the devs in the Serif office was a bit too high, which may have resulted in the aforementioned installation problems, that could in fact be caused by Microsoft's installation policy, requiring companies to use the .msix files instead of traditional installation methods in which the running of .exe files places programs in the Program directory of the system disk or any other directory on any disk the user prefers to install it on. I think the changes necessary to integrate the version 2 suit with the Microsoft Store installation policy, may have given the devs a headache as well and resulting from that Serif's clients, that ran into bungled installations.


Affinity Publisher 2 start up screen


But since it is possible to correct them, I think the Serif team will be able to sort out the problems, but this should have taken place before the release.The installation engine may be separate from the rest of the program, but this is no concern of users - they just want thingsto work properly, which is what they paid for. Although at this point I am intensively experimenting with the absolutely brilliant VectorStyler program, I will still to use the Affinity suite for production purposes for the time being, because VectorStyler still in the development stage. But if Serif slows down the upgrade pace while VectorStyler steps it up, there will come a moment in future when I will make a different decision.

The reason of the update pace being quite low, perhaps has to do with the fact that the software is developed for Windows, Apple silicon - both the Mac OS and iPad version - and the fact that all three programs in the suit are integrated, which means when working in Publisher to make changes to vector art or pixel art Designer and Photo do not have to be opened separately, but all editing can be done from within Publisher. This Studio Link integration, that is the first of its kind in the graphics world and DTP business, will noticeably increase the artists' productivity.

Publisher by the way, can now be installed on the iPad as well, which adds a lot of value to Apple's tablet. because it makes the iPad the first tablet capable of running an (almost) full fledged DTP-program. A long awaited major tool that finally made it into the new Publisher for all platforms is the possibility to create footnotes, endnotes and side notes, which is a function any serious DTP-program must have. This integration of this tool makes Publisher's upgrade the most 'necessary' of the programs in the version 2 Affinity suit.


Conclusion
So, apart from some good aspects to this upgrade, there are too many bad ones, that are not mentioned in may other places on the web or elsewhere. Yet, a certain number of these things nevertheless are worth being put forward, because these programs have become (part of) the livelihood of many that continue to search for ways to survive crumbling economies and continuously soaring expenses. I have listed them below and added some related issues:

  1. The installation trouble for a number of Windows users should have been sorted out before the release of version 2. The mods on the forum should not be suggesting work arounds that require users to dive deep in their operating system (registry tweaks have been suggested), which could easily lead to breaking more than the average user is able to foresee, while most suggestions did not even resolve the problem. This situation should most definitely have been prevented
  2. As Kru Mark correctly reported, there still are several crucial functions missing in version 2 that, in view of the long time that has passed since the previous upgrade, could have been and should have been integrated
  3. Possible upgrades and / or additions of certain tools will most likely be presented in future Beta versions, that are by definition not stable. I one time received the advice in the forum not to use a certain Beta version, because it would not export .png-files properly (which apparently was a known issue, that did not occur in earlier versions....), which brings me to think: Why the heck issue that Beta version in the first place? Is it for users to test or to keep them happy by showing them development still is ongoing? And why would Serif release a Beta version that it advices users no to use? This is a weird type of advice to give to users that simply report that the program is not doing what it is supposed to do and (moreover) what it did correctly before, which makes the situation even more strange
  4. The reason I bought the various Serif products is because I loathe the overly expensive Adobe subscription policy, aside from the other type of disdain they display for their userbase, but I estimate Serif is now at a turning point on how to proceed in the market in which they are operating. The price of the Affinity programs has almost doubled compared to the period in which they were issued for the first time. They still charge a one time fee, but how long will Serif be able to determine its own policies in a time in which giant players simply buy companies that they deem to be interesting for their strategy - meaning: use their code or simply kill them off
  5. Innovation should be higher on the list of priorities of the Serif company, because its competition seems to extend their lead in this field. As a small player in the arena fighting the big boys, the lack of innovative progress is a danger riddled situation to be in, that leads to venues where no company wants to be
  6. The absence of a roadmap that indicates the planned progress of the future versions, is an ominous sign. Blender for instance, continuously updates their publicly issued road map and relatively swiftly integrates the announced improvements, while coding 3D software is necessarily more complex that coding 2D software. Serif not being transparent about where it is going with the suit's development, is rather odd, to say the least, because it leaves users in the dark about the direction in which the company aims to develop. It feels like hopping on an airplane and not knowing where one is going to end up
  7. The startup screens of all 3 programs in version 2 flash a message that the 'Microsoft Store registration is checked' each time the program is opened. It makes sense that Serif registers its users for obvious reasons, but I fail to see why it is necessary for Microsoft to register Affinity users, yet it demands every company that sells products through their store to amend their code. To what extent and in what way would be interesting to know. Particularly since Microsoft is not world famous for being overly concerned with the wellbeing of its users. This seemingly trivial detail could have far reaching consequences that only but very few users are capable of imagining in a society in which the increase of centralized control has gone beyond the type of measure that complies with democratic principles
  8. Almost immediately after buyers of version 2 ran into rather serious trouble - failed installation, not being able to open the programs and not being able to save files created (among a number of other bugs, most of which Serif has not yet resolved....) - this message appeared on the forum in bold white type on a red background at the top of each page: 'Our response time is longer than usual currently. We're working to answer users as quickly as possible and thank you for your continued patience.' Either Serif bit off more than it could chew with this release or other situations have occurred behind the scene that I prefer not to speculate on, but either way, this is bad news. Not being at least somewhat transparent about this towards its users / buyers does not help as well, because such conduct most certainly will provoke conjecture.


Minisforum HX90G


10 port USB 3 hub


Update December 21 2022

The new Minisforum Neptune HX90G mini PC arrived with Windows 11 and installation of the Affinity suit programs from the Microsoft store went without problems. More on running Windows 11 on this computer in this blog entry. So, upgrading to Windows 11 from my very old 2004 rig (first gen i7) cost me an arm and a leg. It includes the hardware - computer and USB hub - and Serif's Universal License. Corporate rule affects an increasing part of today's world.


October 23, 2022

Exploring VectorStyler - Part II


Introduction
After losing the files I saved on a network drive in VectorStyler, as stated in the previous blog entry, I decided to save them on the system drive, which in itself worked well. The problem is that my computer is too old and lacks the power to properly create advanced graphics - realistic vector portraits - as I found out this time with exporting the various stages of development in the png-file format. My old rig has a first gen i7 Intel CPU from 2008 (....), has dead slow 16 GB 1333 MHz RAM memory and an extinct NVidia GeForce 750 Ti, which in today's world probably is considered to be a prehistoric system. I am therefore considering to upgrade to the Minisforum Neptune HX90G with an AMD Ryzen 9 5900HX CPU, 64 GB RAM memory and a M2 512 GB SSD, that has a dedicated GPU - the Radion RX 6650M, while taking up very little space (2.8 liter case). I prefer this x486 AMD mini PC over its Mac competition, because it offers the right to repair and upgradability, plus the fact that the software I purchased, is written for the Windows platform.

The reason that I continue to experiment in this constantly updated, ongoing blog entry with VectorStyler in spite of the problems I encounter with running the program properly, is that it has an absolutely huge potential and many of its incorporated functions already work excellently, while some still require a bit of tweaking. Its developer - a single person, named Csaba Ráduly Baka has so far done a most outstanding job creating and developing the project, in a way that made me convinced of the fact that at some point the bugs will be written out of the code and even more new features will be added. So, this series of blogposts is an on-the-fly test / review / in depth exploration that will last as long as VectorStyler will continue to be developed into a mature state, even when I may encounter additional obstacles.


Export Problem & portrait stage sequence
Because I was unable to export the vector portrait in png-format properly, I made screendumps so that I can still place the progress sequence of the various stages of development in this blog entry. The most recent one is at the top and the oldest one is at the bottom. Where necessary I will enter a comment below the screendumps in addition to the image captions. One crucial aspect of my drawing technique is that I place the reference image on top of all other objects and make it transparent, so that it is easy to retrieve whenever necessary, while its transparency can be changed whenever I temporarily need a more clear image. This is useful especially when a drawing contains hundreds or even thousands of (clipped: objects inside of other objects) objects. From what I have seen in tutorials on Youtube, most artists place the reference image or photo below all others, but for me this does not work for the reason mentioned here.

When the portrait is completed, I will post the vstyler-file in the VS forum, for fellow users to inspect. Note: all photos of Maria Orsic on the Internet are a kind of grainy and jagged black & white type of images, that probably do not do her beauty justice, but I do my utmost to make the best of it. The lack of quality in the photos implies that I was forced to interpret aspects of her face in order to be able to create a portrait that includes the attributes of a realistic depiction of a person. In addition I permitted myself the liberty to lean towards a personal elucidation of miss Orsic' stunning appearance, that also is known as 'artistic freedom', which is a style signature that is present in all the portraits I create.


Tools used in VectorStyler
An other thing is that I did not draw this portrait using the Mesh Gradient tool, which I feel is tedious and time consuming to work with, but I drew separate objects (most of which are clipped several layers deep and blurred, that I named accurately in the Layers panel so that I can find them back at a later point in time for further editing. Also, all objects that are drawn are vectors that will rescale and remain sharp in every size into which the image is rescaled, while the mesh tool is a simulation of pixels in vector format that requires a great amount of calculation when rescaling the image. For instance: many of the shadows consist of a single line with 2 (or in some cases a few more) nodes that probably require less computing power when the image is being rescaled. Editing objects at a later point in time, I find easier also when they are separate objects, each of which can be tuned to what it needs to be, which is especially useful when balancing shapes and colours when an image is in the final stages of the design process.


Brief tutorial on creating objects with varying blur levels
I uploaded a brief tutorial on the VectorStyler forum on how to create objects that have areas of varying blur level ratios along their circumference, that is a technique I often use in drawing realistic vector portraits. The usual type of vector portraits created in Adobe Illustrator almost always have hard edged areas (shadows, creases, hair, facial parts like eyes, ears, nostrils, eyebrows etc.) that make them unrealistic, even though they are presented as realistic vector portraits. Adobe's marketing department has managed to successfully sell Illustrator's shortcomings as a feature and, as commonly is the case, the ignorant majority of the market fell for the carefully concocted scam. An example of such an awful portrait you find here. No offence, but I don't think these portraits qualify as realistic, nor do they deserve to be the maistream standard in that conjured category. But as long as most people prefer to think with their spinal cord, such basically ridiculous type of 'artwork' will be considered to be 'great' by those that have no clue of what greatness is. I have been creating realistic vector portraits for years now and examples of what I mean by that can be found in my website; those portraits hardly have any hard edges, which is exactly what does make them realistic. The process described in this blog entry is the first realistic vector portrait that I drew in VectorStyler - the ones on my website were created in Affinity Designer. I am seriously considering switching from the latter program to the former one mentioned in the previous sentence, which is why I am creating the portrait shown below as a test.


Added the darker areas in the hair and began drawing the left ear

In spite of the calculation / rendering problems my computer presents me, I decided to do a little more drawing. The old machine causes the program to freeze often and say that it is not responding (which lasts up to several minutes at best), but I was dissatisfied with the appearance of the previous stage. In this 12th stint I drew some darker accent areas in the hair, so that at least there is a hint into which direction I am taking this 100% vector portrait. Also corrected the lower eyelid of the right eye. I still need to tweak the colours, intensity, gradients in these areas and add more detail, but I'm afraid that would be challenging this archaic device beyond its limits. After the Minisforum mini PC has arrived and has been set up, I will continue to explore the superb Vectorstyler by way of this project.


Added some more shadows and drew the hair base

At this point the program on this very old computer is behaving very strange, which probably is the result of a dramatic lack of computing power, even when all other programs were closed. I ordered a new computer as described above and will continue when that one has arrived. The hair was done according to the technique I described in the seventh stage. It allowed me to draw a gradual transition area between the hair and forehead. The accents in the hair could not be rendered, which confirmed my suspicion that my machine simply was unable to handle the computations.


Tinkering with shadows on the face

Applying subtle shadows on a face, probably is one of the challenges of creating portraits. If a shadow is off just a minute amount in colour, intensity or blur ratio, there is a risk that entire portrait goes down the drain. So, this took me longer than I expected and I still am far from done. I discovered that in the gradient colour tool each node can separately be given a colour but also an opacity level. Nodes can be added by clicking on the gradient indicator line and typing '+', they can be removed from it by simply dragging the node off the line. Very intuitive. The easy way to draw subtle accents probably is to clip one area into an other (several layers of clipping) which also works well and is easier to control. I will try that in the next stage. In the previous stage I wrote that I wished the blur ratio had a bigger range until I discovered that the interactive tool includes nodes on the top and bottom of the reference circle to adjust the range, which is virtually without limit, unfortunately only in one direction. The developer Csaba Ráduly Baka must have advanced artistic skills besides being a brilliant programmer, because these functional details would never have been considered for implementation by a brilliant programmer who has no artistic skills or too little of them.


Added base shadow on mid and left site of the face

This is the seventh stage already. Edited the mouth somewhat. Tweaking the big shadow until I became senseless - with the blur ratio tool (which I wished would have a more extended range), opacity and gradient colours with a proper number of nodes. Probably some clipping of additional objects will be necessary to get things right. I uploaded a tutorial on how to create objects with a varying level of blurriness along their edge in the VectoStyler forum. Had I been more proficient with gradient colour editing (which is present in VectorStyler) I would probably have used it, but to be honest I dislike that tool from my experience with it in other drawing vector programs. I do like the mesh gradient transparency tool, but I still need to  practice it more in order to efficiently use it. I have to leave the image alone for a while and return to it at a later point in time. I'm sure artists are familiar to this type of situation in which the proper settings just elude them, while that seems to be no problem further into the future (I hope). Part of this problem is caused by the fact that I drew the shadow in one piece, in order to minimize the number of objects, which does not always work...... Also, my ancient rig is beginning to struggle, so purchasing a new, more powerful one kind of climbed on my bucket list. First I have to check the budget though, since being able to buy food is important.


Experimenting with dark background

Editing colour intensity of the blurred shadow area at the right side of face mainly to see how that would appear against a dark background. Most of my vector portraits have a transparent background so that I can place them before any type of background and change my mind whenever it seems appropriate to do. Colour balancing therefore is important.


Added mouth and chin line

Besides working on the mouth and chin area and correcting mistakes in the eyes area, I have begun experimenting with mesh transparency, which is an absolutely brilliant function that is present in none of the programs competing with VectorStyler. I will need this function at a later point in this design, but I don't feel familiar enough with it to apply it already. It is just one of the many functions offered by VectorStyler that devs of its competition have not figured out yet how to code. Still a heap to learn for me!


Added shadow to the right side of nose

While tweaking the left eye VectorStyler froze and offered a weird message without saying what was wrong. After closing the program and restarting it, I was offered the option to retrieve a back up, which worked just fine. Immediately the developer responded on the forum and reported a bug. This type of swift support I have never experienced anywhere in my long involvement with software. Great!


Added shadow on the right side of face

Besides adding the shadow on the face' right side did some tweaking of the right eye. Shadowing requires a subtle approach, both in intensity, giving objects a blur ratio and applying colour accents. There still are details that bug me, but I am sure that I will get them sorted out at some point, as I become more familiar with VectorStyler.


Added right eye

Copied left eye to the right. Reshaped elements with the move- and node tool. Adjusted colour accents and lighting, mainly in clipped objects. Renamed copied left eye objects to right eye parts in Layers panel, this because there already are many objects in the drawing that I need to retrieve at a later point in time for further editing, when looking to rebalance colour intensity, because in portraiture moving and reshaping (parts of) objects just a few pixels determines the quality of the likeness, as do do colour accents.


Added shadow behind the left eye

So far, I have mainly been using the Gaussian blur function, object clipping and interactive transparency, all of which work superbly. Many image effect functions - such as blurring - can interactively be fine tuned on the spot, which offers artists the option to exactly and instantly see the result of their tweaking.


Started drawing the face contour and left eye

When drawing realistic vector portraits, I always start with the eyes, because they are the dominant factor in facial features. For drawing I use the pen tool and the node tool to fine tune. Most objects are given a Gaussian blur effect. Colour management in VectorStyler is very easy to use with great precision.


Stage 15 - vector outline


October 17, 2022

Einstein analog / digital portrait


This is a proverbial combined freehand airbrush / Affinity Photo portrait of One Stone a.k.a. as Einstein, the relativity bloke. The man that urged Roosevelt to develop nuclear arms, that the US used to bomb Japan (twice) when the outcome of WW-II was already decided. In a long lost past I used to take up the airbrush gun and spray paint on different kinds of surfaces. With one or two exceptions always worked freehand, i.e. without any masking. 

Today, I work in the digital realm mostly, because it is convenient, less of a hassle and - most importantly - corrections are relatively easy to make in less time than is the case with an analog airbrush. I do sometimes however pick up the trusted Iwata or Harder & Steenbeck airbrushes to get my mind off things I need the time to process in a proper way; the old way of airbrushing works better to do such a thing than the digital stuff.

I used the Iwata HP-BH airbrush to spray the Inspire H2O paint on an old piece of paper that I had laying around. Very low air pressure, thinly diluted paint and Chillhop music to drift away, but not too far to be unable to do anything useful. To be honest, I like the HP-BH more than the Custom Micron, probably because I like different things better than what commonly is considered to be the best of the best. I was forced to buy the HP-BH on an airbrush show, after one of the visitors had stolen my Paasche V1 - which was the best tool ever - when I took a break and left the V1 unattended on the easel.

I dropped the HP-BH on the floor and because I never use the back cover of airbrushes, the needle was driven into the nozzle quite hard. I had to get it out using a pliers, because it was firmly stuck. However, the HP-BH kept on spraying like it never happened and I used the same needle and nozzle for years after the incident without any problem. I would not recommend hammering the needle into the nozzle before use, but I became convinced of the high quality of Iwata airbrushes.

Being a senior geezer, when finding an old airbrush painting, I see mistakes I made and correct them in Affinity Photo - a digital photo editing program, that resembles Photoshop, but is much much cheaper and equally as good or better. Check out my pixel paintings and vector portraits in my VectorWhiz website that you find here. Most recent stage at the top, older ones in chronological order, below it.


Digitally edited in Affinity Photo


On my DIY vertical light table


Analog airbrushed with Iwata HP-BH


Analog airbrushed with Iwata HP-BH


Early stage


October 10, 2022

VectorStyler - vector drawing program


By accident I came across a new vector drawing program called VectorStyler. Someone mentioned it in a Facebook group and I decided to give this program a try. What I saw was close to mind boggling; the functionality of this program takes the cake out of its competition. It still is a beta, so it contains bugs, but if its developer succeeds in repairing them, there is nothing in the market that has as many functions, not even the well established market leaders and promising runner up programs. Not by far, I may add - it is chockful of tools and functions, some of which are unique (but quite useful) to the community of vector drawing artists. Vector-Styler has all the functions its competition combined has and then some.....


Vector image created out of
enthusiasm over VectorStyler


It is available for Intel Macs, M1 Macs and Windows. VectorStyler is developed by a one man team (!!!), someone named Csaba Raduly-Baka who resides in Finland. When peeking into his other (high level advanced and complex) activities it is difficult to imagine where he finds the time to combine all his activities.... The overwhelming measure of functions that the program offers, obviously results in a necessarily extensive user interface, so figuring out how things work, requires time to get familiar with them for users who come from other programs. But like I wrote: If the developer tweaks the code to function properly, it will most definitely be worth to struggle your way through the learning stages and wait until the bugs are corrected. Currently - March 2021 - he is asking for feedback (not money) from his users to fix bugs in the program code. Visit the VectorStyler Forum to post bugs or make comments. The developer is very responsive, which also shows in the large number of bug fixes in the various beta versions that succeed each other rapidly. This is a project most certainly well worth your attention and support.

I'm new to this program myself, so I still have to explore what it can or can not do (the latter part of the sentence I added for linguistic completeness rather than hinting at a lack of functionality). To get an idea of what it is capable of, check out their homepage (scroll down the page somewhat) and the detailed feature list in the second link above. It still is free while in beta-stage, so go download it and give it a try. I am sure you will be thoroughly amazed and that the competition may turn pale from anxiety and possibly start crapping their panties resulting from that. The program is said to cost a one time fee of just 99 USD when it comes out of the beta stage, which is quite a reasonable price in view of its stunning functionality.

I currently use Affinity Designer to create vector art, that has an easy to grasp user interface, but by far not as many functions as VectorStyler. Like all other vector drawing programs I have used in the past. I have worked with Illustrator professionally for decades, while working with CorelDRAW privately and with Inkscape occasionally, but I must say that none of these match VectorStyler in the functionality department. That is a stunning accomplishment for the single person development of VectorStyler. I will therefore keep a close watch on how the program evolves and keep you updated as I familiarize myself with it. You may even find some artwork resulting from this process in this blog. Stay tuned.


Update October 10 2022

I now began testing this program, in a more intense way than before, familiarizing myself with the UI and tool functions. Since VectorStyler is densely packed with functions, unavoidably the UI is complex. Not more complicated than Illustrator's interface, while offering a lot more features, but I had to find my way around in it. So, figuring out how to apply image effects was an adventure, that I figured out after some trial and error. What drives me to survive the steep learning curve, is that I truly believe that once the bugs are written out of the code and perhaps the UI is a bit more streamlined, this program will become the first choice of many artists. Some features that I already encountered in this first serious venture are:

  1. VS has real vector brushes, not the bitmap ones that are presented to be vector as in Affinity Designer, which keeps images crisp when increasing their scale
  2. VS has many warp (distortion) functions (including mesh warp), many more than any of its competitors, including a liquify tool that is applicable to vector objects
  3. VS has a ridiculously easy to use shape builder tool
  4. VS has a knife tool and a vector erase tool, that works exactly the same as the eraser in photo editing programs
  5. VS has a configurable object blend tool
  6. In VS users can create vector tiling patterns
  7. VS can import, edit and export genuine AI-files, maintaining their object layer structure
  8. VS has a stunningly huge number of image effects that can be fine tuned in the related panel, offers a visual way to edit the effects, can combine multiple effects and can show / hide, reset and remove effects at a later time, which makes the program parametric to a great extent and non-destructive up to quite an elevated level
  9. The VS community is responsive and helpful and the developer fixes bug quite swiftly, while adding new functionality
  10. VS objects can be copied and pasted into Affinity Designer and Adobe Illustrator where they can flawlessly be edited as if they were native objects. Copy& Paste objects from its competitors does not always go without flaws, especially if they contain bitmap elements
  11. VS has an object collision tool (....)


Text warping in VectorStyler


The above text was warped in VectorStyler. One of the brilliant tools in the program is this object warping tool, that can of course also be applied to text. It is possible to do this in Affinity Designer, the program I use most often these days, but it takes at least 10 times more time. CorelDRAW has an envelope distortion tool that sometimes produces strange results. Adobe Illustrator can warp objects as well, but it has to be controlled from within separate panels, which is slower and less intuitive. In addition, VectorStyler has a slew of different tools to warp and deform objects, so basically it is possible to create any type of shape one could think of, including intricate deformations in an interactive way. Simply brilliant.

I am sure there are many more things worth mentioning, that I have not yet encountered, but like I wrote, this is my first dive into the depths of VectorStyler's functions and tools. There are still bugs, some of which make the program instable, but its potential is so huge, that I will keep trying to become more familiar with how to use it, particularly because of the excellent support department. Note I changed the date of this blog entry to October 10 2022, to allow visitors to become informed about the progress of this mind blowing program. If curious, go visit their website to download the trial version, that is free for 42 days, which is a generous offer that you won't find anywhere else. The insanely costly monthly subscription Adobe for instance, offers a 7 day trial for its suite programs. Over time you may find more updates of this blog entry, as I progress in learning how to use VectorStyler properly, so stay tuned.

A very useful resource on how to use VectorStyler is the Youtube channel of artist Fred Lespine. On Vimeo there are many tutorials on how to use the different tools / functions. On VectorStyler's own website, having a peek at 'Discovering VectorStyler', will offer useful tips for those who are new to the program. On Ben Designs Youtube channel he explores VectorStyler. On the MacRumors website there is a post about VectorStyler and the comments to it by users who discovered program functions and tried out how to use them.


October 6, 2022

Mark Twain T-shirt design cartoon


Mark Twain is one of the best know and most read novel writers who graced this world with his preseance and works. Years ago I painted a portrait of the man in pixels from scratch in Affinity Photo, which is the Serif company's equivalent (and I mean this quite literally) of Adobe's Photoshop, but at a low one time fee, so artists aren't bound to a hugely expensive subscription model. Even though Photo still misses some minor functions compared to the industry standard, while on the other hand having some that exceed it, Photo is a most excellent alternative for artists that hate being forced to pay a high amount of money every month to purchase the 'alleged privilege' to use it.

But Serif has also created a magnifient alternative for Adobe Illustrator, a vector program that - like Photo - misses a number of functions, that it amply compensates with different functions that are not included in Illustrator. Creating various level of hard / soft edges around an object being the most interesting for artists who dislike the unnatural hard edges many vector programs offer. The type of artist I am referring to, prefers to create more realistic art, in which had edges are mostly absent. This program is named Affinity Designer, my favorite program, since quite often I create realistic portraits in it (the progress sequence of which can be seen in this blog).

While normal people on average use about 3000 different words to communicate, Twain used approximately 8000 words in his books most of the time. Expressing himself with such an extended verbiage allowed him to say and write things that makes people wonder at least and feel mind blown in other cases. Even the most simple and basic things of life he managed to craft into small or impressive literal miracles, simply because no one ever before had the idea to express them in the eloquent way that became his trademark manner of writing.

One such quotes I used to create a cartoonish image of Twain, around which I placed his words. It is an all vector image, created in Affinity Designer of course. Below you see the different phases of the cartoon portrait, including the misinterpretations that were in them before reaching the end result. Google's Lightbox can be accessed to see the various stages, by clicking on an image. On a PC or Mac it is also possible to scroll through the images, using the mouse wheel, which allows to see the changes in the stages more clearly in Lightbox. Newest image on top, the older ones below that.

Years later I found the penultimate image below and thought: this could be done better and I came up with one that is directly beneath this paragraph.


September 19, 2022

Emojis


Here are a few emojis drawn by me in Affinity Designer, so they are all 100% vector. I did not want to make flat images without gradient colours and tried to mimic human facial expressions, of course exaggerating them somewhat. Exaggeration - imagining the extreme aspect of things - often helps to see the possible consequence of seemingly innocent thoughts, developments and policies. The one at the top is a T-shirt design, the rest below it are just plain emojis. In the captions below each emoji are links to alternative versions of the emojis shown here; you might want to take a peek.... 😄


T-shirt design and a
version for evil people


Wink
for other opinions


Devious
for out-of-the-box-thinkers


Grin
have nothing to hide?


LOL
for mainstreamers


Mental
for the annoyed


Erm....
for those who see


August 25, 2022

Nicepage website builder revisited


I started using the Nicepage website builder in around the beginning of October 2021 and after a few weeks wrote a rather enthousiastic blog entry about it. I tried several other applications that allow users to build websites, none of which matched the capability and diversity of Nicepage. Since that time my enthousiasm only increased and during that period of roughly one year Nicepage has issued over 20 updates ( ! ! ! ), that added more functionality still to the program, all of which make sense. Also these updates never came with bugs, so their dev-team is not only prolific, but also very skilled. To get an idea about their productivity, you may want to visit their page that contains Nicepage's update history.


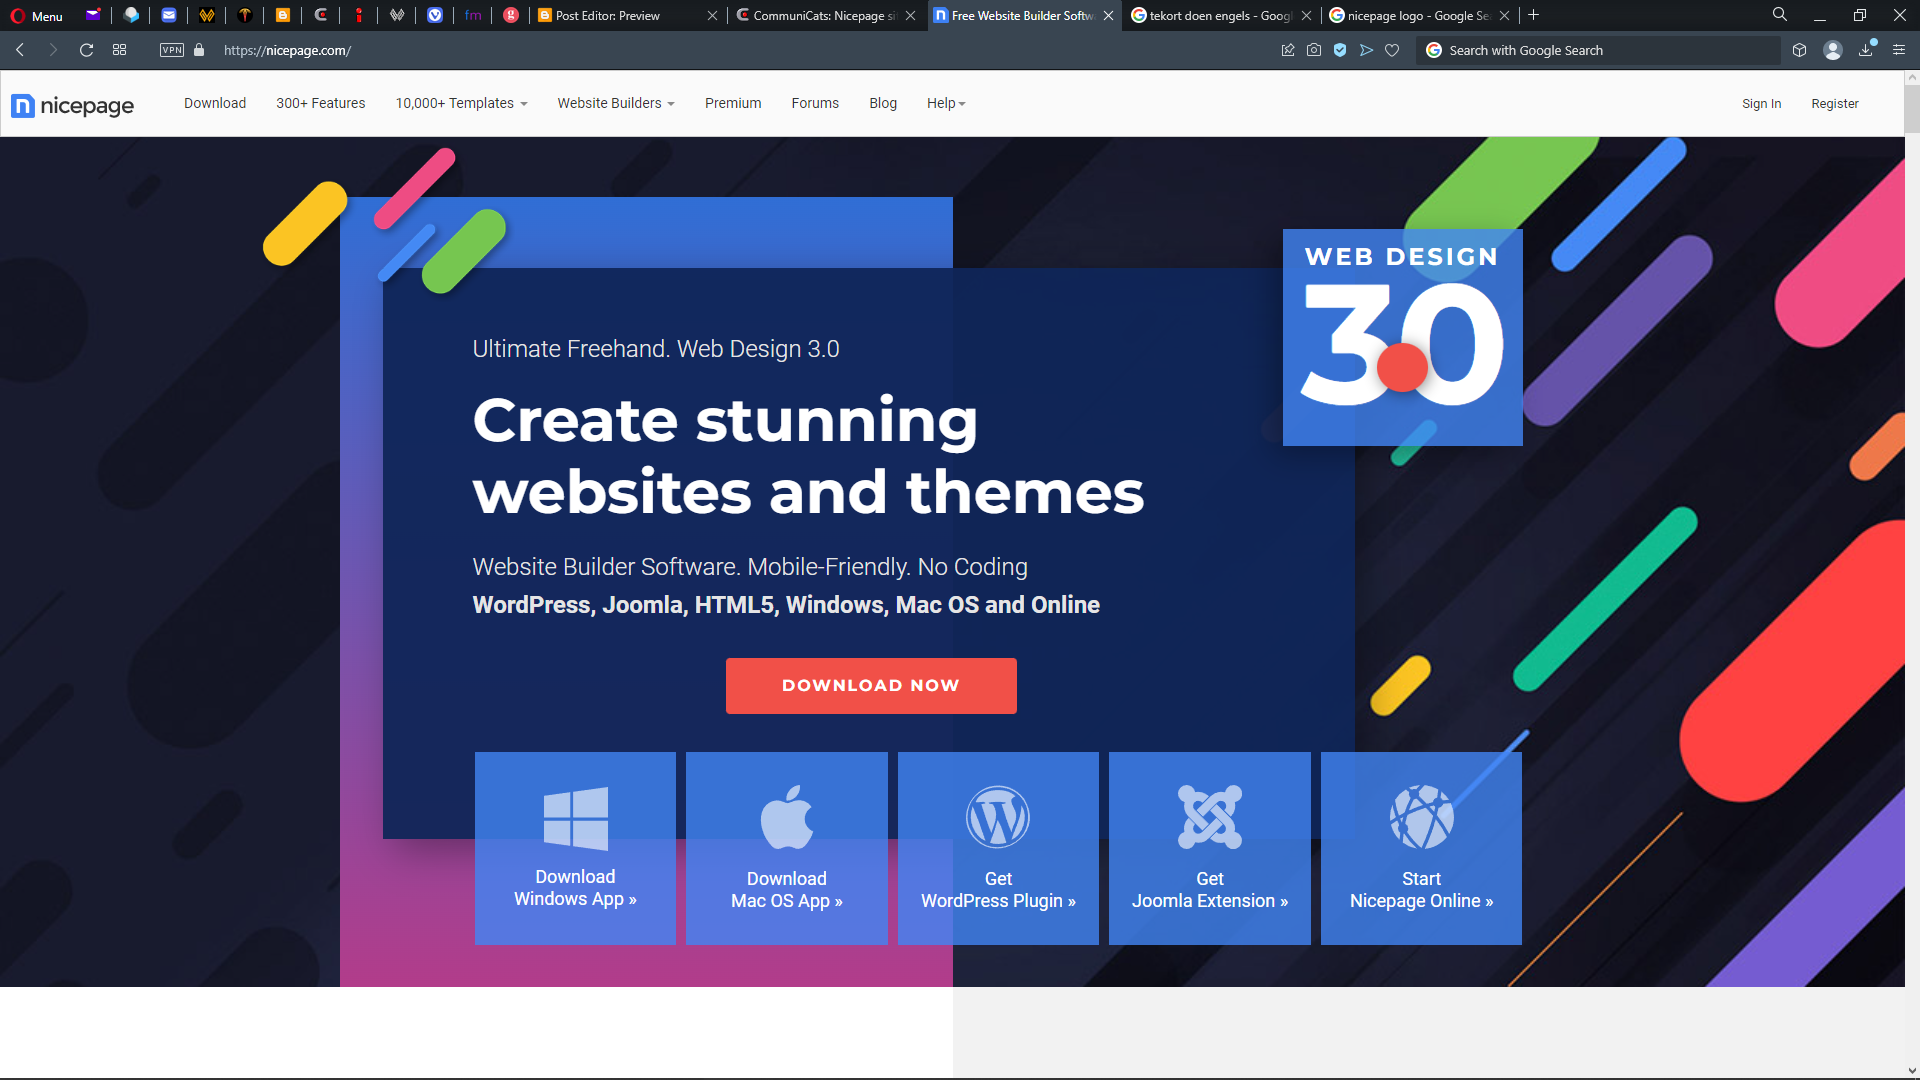
The Nicepage website


I would recommend this program to both beginners and seasoned pros, because building a website with Nicepage requires no coding whatsoever and is capable of what Nicepage calls Web 3.0, which means objects can be placed anywhere on the page without restriction, while it offers total freedom of positioning along the Z-axis as well. A few years ago, this may have seemed to be a dream that was out of reach for website builders, but Nicepage has made all this possible, while building a clear and intuitive UI, that is top of the bill in the industry.

The number of features that the program has, is incredibly large and yet expanding rapidly. The same goes for the continuously growing number of templates they offer their users for free.... Any designer that hasn't at least given this program a try, is depriving him- or herself of fantastic functionality, creative freedom and sheer speed. And by the way, I am not paid to write any of this; it simply is the high level of productivity and creativity that Nicepage makes possible for website builders, that inspired me to compose this blog entry.

Beside website builders the program is also very well suited for prototyping and UI design and, I dare say, it is so diverse and powerfully efficient that these stages can be skipped. It therefore allows to meet deadlines that other programs are incapable of achieving and make design work a lot more pleasing, because Nicepage removes all restraints that programs of its competition have not yet been able to resolve. Website builders can therefore communicate directly with their clients and apply the changes they request, can be implemented instantaniously. This is a big argument for creative non-coders, that has the potential to increase income drastically in considerably less time.

I use Nicepage in combination with Affinity Designer - a cheap, no subscription vector drawing program and Affinity Photo (a Photoshop like bitmap editor), that can also be purchased for a low one time fee. Nicepage offers its various versions for very modest subscription fees, that by far most designer will not consider to be unaffordable. So, if you're fed up with bootstrap grid restrictions for placing objects, coding and unresponsive support departments, you should definitely check out Nicepage, that also offers a free of charge version for individuals. Finally, all upgrades are handled from within the program - users are notified of an update and can do so immediately. It does not get much easier than this.

Finally, I have to write a few words about Nicepage's support, which is unsurpassed. I ran into trouble once or twice, encountering a bug (which is a rare thing, even when the devs add functionality at an incredible speed), but the developer team addressed the issue immediately and one or two days later the problem had been fixed. I have never experienced such fast resolutions with any program that I ever used. Nicepage really makes an effort of supporting their user base with great pace. This should be an encouragement for website developers that serve many clients; once they run into a problem, they will not suffer from it for a long time and will remain able to serve their clients properly and continuously. This is a really good argument to try out the program.